Sunday, April 28, 2013

From the Desk: Weekend Roundup #29

Bleh...

Quick update from the desk. Progress on the Extrevean and on the 2 Afflictors. The second Afflictor is purposefully off screen hiding. There's also progress on the Archangel, but that's off in a separate set of posts.

Thursday, April 25, 2013

From the Desk: More Archangel Assembly Progress

Life really erupted on me the last couple weeks. It also doesn't help that I picked up the first Dresden book and spent a few evenings reading instead of painting. However there is some progress to show.

So more assembly on the main body. Everything except the wings at this point, along with green stuff work on all these parts as well. Something in particular I'd like to point out is the tail. I opted to run a pin from the base, outward, and then up into the tail to help stabilize it. This also allows the tail to curve upwards a lot more and give just a hint extra sense of movement overall. I really didn't like the idea of having the tail simply resting on the ground.

I appreciate the previous comments about sending in the wings for replacement. After pondering it I have opted not to, mostly because I actually want to take on the task of the repair work myself just for the experience of it. Hopefully some of that will start this weekend.

Tuesday, April 16, 2013

Victor Pendrake

Finished Pendrake (finally) towards my April painting goal. I'm already halfway through the month and still a long ways from my goal. It's been a brutal month for work and I'm just getting crushed. It'll be a miracle if I pull this one off.

Just quick notes on Pendrake here. I pretty much speed painted this one and took a few shortcuts. The primer coat was also terribly grainy which screwed up some things as well. However I muscled through it and got it done. I spent way more time on the base for no particular reason than to add some flare and offset the other glaring mistakes. In any case, he's done!

Saturday, April 13, 2013

Archangel: Trimming and Disappointment

Ok, first the good news. I got some solid progress in this week on assembling the Archangel. Here you can obviously see a big chunk of assembly in getting the main body attached to the base along with the back half of the head, the left leg and leg chitin, and the upper half of the tail. I've done the vast majority of the gap filling as well which really feels good. Not pictured here, but I also got the upper and lower half of the head put together but didn't get them attached to the neck yet. Ok, good news over. Let's take a look at the bad news.
In my "quick scan" of the parts in the store and from before I totally missed a major problem: one of the claws on the wings is entirely missing. You can see it here. There appears to be a small hole as if to receive a pin, but there's no claw in the kit to go there. My plan at this point is to try to sculpt one myself. A friend of mine classified this project as a "collaborative sculpting experience" which is turning out to be somewhat true. In any case, I'm mildly annoyed but not so much that I intend to delay progress by trying to request a replacement wing. I'd rather take this as a challenge in order to strengthen my sculpting skills.
The tail had a bit of a problem as well. At first glance it looks like a major issue, but it turns out this miscast is actually along the lower side of the tail and sort of blends into the surrounding base. I did some quick greenstuff work to smooth it out and then once it was attached to the main body and base it's basically unnoticeable.
And what do we have here? Nasty mold lines. This is actually the more frustrating thing about the wings to me. It's going to take a while to clean these up so that I'm sufficiently happy.
More on the wings, even though one claw was flat out missing, several of the other claws aren't really much better. Due to how the flashing braced the whole thing, the claws really were a mess. I just did some basic trimming to start but there's going to be a lot more work to do in cleaning these up. I may even just surrender on them, sculpt a whole new set, and replace the stock ones. I've got to think that one over though.

Tuesday, April 09, 2013

Archangel: Beginnings and Unboxing

The new Archangel model is a majestic thing to behold. This will now be the 4th huge-based model that I'll be working on and I decided that this one above all the others really deserves special attention. To that end I'm going to chronicle my progress here as I go along. It'll be a slow process since I'm also working on other projects, but my goal is to have it completed in time for Lock & Load. So with 7 weeks to get it completed, I now embark upon my quest!

The first step with any model is to take all the parts out of the box, make sure everything is accounted for, and look for anything obviously mis-cast or broken that would need replacement. Fortunately I was able to do a quick scan of the pieces at the store to make sure everything looked intact. With that first step out of the way, let's take a quick survey of the parts.

Body and Base:
The main body and the base are pretty solid pieces. On a cursory glance, the base looks like it has virtually no trimming needed, and the body looks like it has minimal trimming.
Arms and Tail:
There's actually a couple extra bits in here, but these are all the smaller resin pieces which is mostly legs, arms and the thicker half of the tail. There's also a piece of the head there. Again, upon cursory glance they look pretty good.
Bits and Tail:
These are all the metal bits. Smaller wings, head, spines and claws. These bits all look great. Admittedly I worry much less about flashing and miscasts on metal parts. I rarely see miscast metal parts and trimming of metal is super easy for me.
Wings:
Ok, now we come to the ugly part. Now seriously these are nice wings. Really nice. But holy smokes are they going to be ugly to trim and clean up. Really ugly. I see why they did what they did, but honestly they look like they will be a nightmare to take care of. Let's take a closer look...
Wing Details:
Here's a closer picture of some of the wings. As you can see, it's a real mess for trimming. I'm not sure I should have expected any less though. In order to mold them so that they wouldn't be too fragile during transport or too difficult to get out of the molds they had to have all the extra bits, but cleaning it up is going to take a while. I imagine that I'll spend at least as much time cleaning up the wings as I do all the other pieces combined.

So that's 20 pieces, which is significantly less than many other Colossals have been. And unlike my Judicator project, I expect to be able to assemble this entire model before painting which will be nice.

At this point I did a quick dry fit as best I could to get a sense of size at this point. My best estimate is that this model stands between 11 and 12 inches tall.

Now that I've unboxed and accounted for everything, my next step will be to start trimming and build a plan of attack. My top concerns at this point are the assembly of the tail so that it's solid, and the trimming of the wings. As I said above, my hope is to have frequent progress updates here, even if they don't seem very significant, just to keep my motivation high.

Sunday, April 07, 2013

From the Desk: Weekend Roundup #28

Three weeks have passed? Ouch! This is going to be a whirlwind post due to some recent events in my life. For those actually interested, read all the way to the bottom.

First up are the Secret Weapon terrain pieces I finished recently. I'd been working on them very slowly for a couple weeks but I finally got on the brush and finished them a couple days ago. I really enjoyed painting them actually. I used them as an experiment opportunity, combining airbrushing, two-brush-blending, washes, pigments, oil paints, and some alcohol-based paints as well. I think they turned out pretty well actually for fast-painted terrain pieces.

Next is a quick terrain piece that I got from the Gold Rush Rampage tournament. They had these as flag markers. I used this as an opportunity to experiment with the "dot oil filter" technique. The original tutorial that I referenced was this one from Secret Weapon Miniatures, although I'll freely admit that my results are dramatically different due to the texture of the piece I was painting. In any case, it was a fun experiment and I'm looking forward to trying it some more.

Next is the progress on Pendrake. This model has suffered from a poor primer coat that's a bit grainy, but I'm muscling through it. This will be the first model in a long time where I'm painting it attached to it's base rather than separate. Normally I hate to do this, but I figured it would be good practice to do every so often.

And here's the Extreme Carnivean. It's a monster of a model and it's going to take a while. I'm starting with the exposed muscles and trying to get a good bloody/fleshy look to it. My buddy Lance described it as looking like "a sausage factory exploded", so I feel like I'm right on the mark. It still needs a few more coats though to really darken it up to make the blood look more ichor-ish.

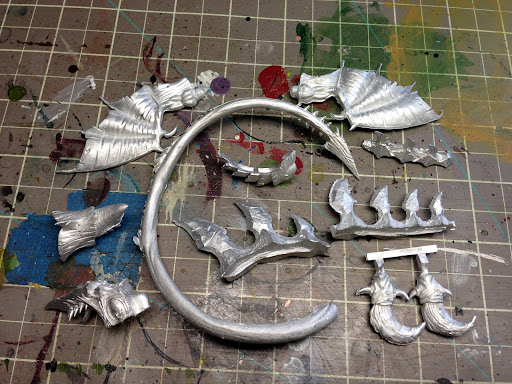
And finally is just a little preview picture of an Afflictor being assembled. It's pretty easy to guess at what's going on here.

On a personal note, I was in a car accident this last week. Specifically I was in the middle of a 4 car pile up where the last car slammed a BMW into the back of my Outback which then squashed me into the back of an F150. Fortunately no one was injured, but the guy that hit us all from behind sped away from the scene. What the hell is wrong with people? In any case, I'm a little sore but otherwise unharmed. Mostly I'm just ticked off cause I need to get my car repaired.

Tuesday, April 02, 2013

Play It Painted: April Goal

Super fast to document my goal for April (mostly for my own motivation):
  • Paint Extreme Carnivean
  • Paint Pendrake
  • Assemble and paint 2 Afflictors
  • Assemble Archangel
If I do all that, it'll be a miracle.