Showing posts with label modeling. Show all posts

Wednesday, October 22, 2014

Yesterday at the LGS

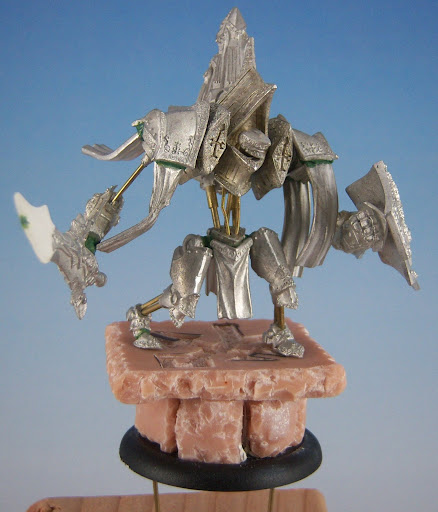
Yesterday I went down to my LGS to play and help out someone. On our local forum someone posted that they had gotten an Archangel but didn't know what to do about the wings. I jumped in and suggested using a couple long pins. This guy asked if someone could help and I volunteered to meet up with him at the LGS to do it. After half an hour of general chit chat and drilling and cutting and explaining and, well, just general BS'ing and modeling, it was all set. I'm happy to say the pins worked nicely and the pieces fit nice and tight. It was a great experience all around and doing it at the LGS was especially nice since other people came by asking questions. I had brought my own Archangel along which of course draws a lot of attention being such a huge model.

After the pinning exercise, we played a 25pt game as well. Mark (the guy I helped) is relatively new to Warmachine/Hordes, so we had a nice casual game. I had given him the option of picking stuff for the list I was going to play and he requested pThag and a Raek, which I happily obliged. I ended up rolling a tier 2 pThag list that included Ogryn and an Angelius. The picture shows near the end where pKaya was in a lot of trouble, pinned behind a bunch of nasty. There was a moment where I thought the Warpwolf Stalker was going to slip loose and have a run on Thagrosh, but my hardy Warmongers held their ranks and the game went my direction. Still though, we both had a great time and I was able to give him a bunch of tips about scenarios and just little things around tighter game play.

Having a vibrant Warmachine night at a great LGS is definitely a fortunate thing to have, and getting to contribute in a small way to help it stay vibrant was a nice way to break up my work week last night.

Sunday, April 13, 2014

RtC: Gnarlhorn Basing

So lots of stuff happening on my paint desk, but this is one of the most significant things. I got the rest of the base prepped. More work happened after this picture, but I wanted to share this one since it shows the main Gnarlhorn model actually sitting on it. It took a lot of work to get it where I wanted and such that I could also include the tree behind him. Fortunately the layer of pink insulation foam made the process of positioning the model easier.
I also got a couple Stingers finished, got started on the first Beast Mistress, and a bunch of work in assembling Shredders.

Tuesday, April 08, 2014

Class Review: Scenic Basing with Seth Amsden

This last weekend I had the pleasure of attending a basing workshop given by Seth Amsden. The aim was to impart Seth's techniques and thought process on how he builds scenic bases, particularly plinths, for the projects he works on. My review here won't do justice to the class, so instead I'm going to dump some of the photos from the class and then just dump all of my random notes here for reference. Let me just comment first that Seth was a great teacher and a remarkable artist. He put a strong emphasis on using reference photos, especially taking pictures of the places where he collects basing materials from.

Photo Dump Section!

Example base from Seth. This one was a great example of a classic scenic base.

Another example. This one started as a chunk of wood. And yes, he painted the wood to make it look like wood.

My base after 3 hours of work. Obviously not primed. I was creating a little scene where someone created a small makeshift foxhole. We'll see if I end up using this for a real project or not. It doesn't look like much here for 3 hours of work, but this is actually a huge leap forward from anything I've done before. I tried to incorporate all the elements and techniques that Seth showed us previously to make sure I had absorbed the understanding.

Seth painting his example base. This was a unique sort of experience to watch. He first primed it black, then did a directional white primer coat to set lighting direction. Then to paint it he dunked the whole thing in water and proceeded to put paint straight from the droppers in a bunch of places. Then he used a fairly large brush (probably a 4 or 5) and washed and blended the paint around. The whole thing stayed wet. The philosophy here is that it creates a color harmony over the larger area and the wet on wet allows the primer coat to show through a bit which automagically creates highlights as well. He used blue-greys on the stones and browns on the earth parts. The net result was sort of a classic Mike McVey 2-step process that goes from base coat to magical highlights and shading in a single step. For me this was a massive "Ah ha!" moment though for painting larger bases like this.


Note Dump Section!
So here's a dump of all the notes I scribbled down. If you're curious for more details, just post a comment and I'll explain in more detail.
  • Yellow Milliput is the best to use for basing due to it's "grit" level.
  • Combine yellow Milliput and Green Stuff (60/40 ratio) as a good working putty for basing. Mix each separately then combine and mix. The green stuff gives it more working time, and the Milliput makes it harder. Adding just a touch of water helps in the whole mixing process too.
  • The above mixture is great for making banners too. Roll out a thin sheet of it and press a cotton t-shirt into it slightly to give it some texture.
  • After mixing the Milliput and Green Stuff, mix in some of the long static grass (the 2" length stuff) into the mix. Then tear off chunks and the grass will stick out of the putty like tiny roots. It also creates a nice natural texture to the putty on the torn edge. I can't express how much of a great tip this was. All of the residual grass sticking out of my project plinth was from that method.
  • To create a nice "receptacle" point for the model that will be added, create a little spot of putty and press the model into it.
  • When using grass tufts, use small scissors to trim them to different heights.
  • "O" scale model railroad stuff is the best scale typically.
  • When using oils, do a quick gloss seal first. Seth uses Future Floor Wax (or an equivalent) for this. The wax has a self-leveling agent that fills in the tiny pores creating a smoother surface for the oils to spread over. After finishing with oils, seal with matte sealer before proceeding since they take a long time to dry.
  • Future Floor is also good for washes since the leveling agent will help drive the wash into the recesses. It also dries really fast so it's great for quick sealing passes or washes in that respect.
  • Future is also handy for thinning inks for the above mentioned reasons.
  • "Inks before washes". I didn't get a chance to ask more about this comment.
  • Partway through the workshop, Seth gave everyone (that was relatively new to airbrushing) a ping pong ball. He said the practice exercise is to put it on a stick and try shading it like a sphere. It's apparently harder than it sounds.
  • Mix dry pigments with oils to create textured effects, like moss.
  • When working with oils, use two brushes: the first is to apply points of paint in the various places, the second clean and dry brush is for working the oil around. Oil paints tend to be fairly transparent and will let the lower layers show through better than acrylics.
  • Use mineral spirits to clean brushes after using oils.
  • Seth swears by Andrea paints.
  • Use tree/bush roots to create branches.
  • For the demo base Seth did and then again for mine, the steps went roughly like this: glue down big rocks. Add putty/grass mixture. Add branches/roots. Stuff in slate pieces, medium rocks, etc. Glue in small rocks/sand mixture.
  • Seth sometimes uses a "glue where it falls" approach. So glue down a big piece of something that can be crumbled, then lay down a layer of glue around it, then use pliers to crush it and let the crushed pieces fall into the glue. Simulates gravity and erosion all at once!

Shopping List Section!
This is just a quick shopping list of things I need to get and add to my hobby arsenal:
  • Slate tile from DIY store - Take it into the back yard with a towel and a hammer and smash it to make little slate chips. Seth's example bases both used these.
  • More glue - Especially superglue. I used a ton of it.
  • Pink Insulation Foam - I should have had this long ago, but finally I have a better reason for it.
  • Brass Etched Jungle Leaves - I bought a small pack at the store when I was there, but I see myself using far more of these in the future.
  • Superglue Accelerator - I've never seen a critical need for this, but Seth's process moved fast in assembling a larger base and there's a definite value in that.
  • Disposable Gloves - Mainly for working with Milliput. I've always hated working with Milliput before but Seth's class has turned me around. But using gloves is clearly mandatory.
  • Oil Paints - I'll probably spend more time practicing with the ones I already have, but I can see myself using these more in the future.
  • Andrea paints - I need to just find these and order some. I keep hearing how great they are.

Sunday, December 09, 2012

From the Desk: Weekend Roundup #18

Productive week, but the weekend wasn't so much unfortunately.

Tons of progress on the Throne. Almost everything is base coated at this point. The metals are mostly done. The skin is about half done but needs some serious shading work. The chitin and claws obviously need a lot of work. The mouth is about half done as well but I'm debating whether to use some purple tones to help tie things together. The base of course is nowhere other than gluing down the beginnings of rocks and such. It's such a large area to cover that I really need to find some other stuff to add but I'll figure that out as I get closer.

I should note at this point that my goal is to have it done before I leave on vacation on the 20th, but that timeline is getting pretty tight. It's going to be a stretch, particularly if I'm trying to get any actual games in as well.

Second is the Judicator. I'm down from 63 pieces to 20 pieces. Granted, a large portion of that was the missile ports. However getting the legs and main torso mostly assembled was a huge feat and it's coming together to a point where I can start to envision it. The real key is going to be getting to the level where I know what I do and don't want assembled prior to painting.

And that's it. Nothing else on the desk at this point other than the Extreme Carnivean, which didn't get any attention. That project will definitely be waiting until I get back from vacation so that I can spend plenty of time on it.

Monday, June 13, 2011

From the Desk: Nephilim Putty Party

Confession time: I finally broke down and bought Starcraft 2. This coupled with more work travel will likely impair my painting/modeling productivity. In fairness to myself though, I did hold out quite a while. And it is pretty rockin. Anyway, that's not what this blog is here for, so...

One of the tips I got from Derek Schubert's sculpting class came in really handy this last weekend: stick the putty to your off-hand thumbnail. It sort of makes a little putty palette, and I found it works really well. I just kneaded up some, stuck it to my thumbnail, and then I could slice off a bit with my sculpting tool easily. The thumbnail makes a good surface because the putty sticks enough to not fall off, but not so much to be hard to remove. It's so simple and yet such a helpful tip. And why was I putting this into practice? Well...


My Nephilim are almost all assembled! The Bolt Thrower is going to have his quiver attached after painting simply due to the amount of problems it will cause for accessing parts of the model once it's on. The Solider just needs his sword/arm attached which will require a little putty work. The Protector is in a similar state, but his arms and polearm are going to be a bit more work to get all together. I'm trying to decide on a pinning strategy still.

I also tried out some Krylon Satin Finish last week. I can honestly say that appearance-wise, it looks pretty much the same as my double coating of gloss/dull. I haven't really tested it for durability, but I'm very likely to make this switch for things going forward once I run out of Testors supplies, especially since the cost is so much better.

Saturday, April 02, 2011

RtC: Base Progress

Countdown to KublaCon painting competition: 56 days

As I should have expected this. My motivation and free time have both dwindled dramatically. Business trips, getting sick, and more house guests have erupted during the last 3 weeks. Nevertheless, I'm trying to make some progress.

So I started doing some work on the base. Pictured here is a bunch of the components for it. The main reason for working on the base this early is (as I mentioned before) the weakness of the legs. This was a significant problem given my normal painting process. I typically attach models to an empty spray can in order to hold them better while painting. However since this guy is so massive and with such a thin right leg, I quickly realized I needed to better secure him somehow. Attaching him to the base is my only logical recourse. Normally I wouldn't do this unless absolutely necessary, but for some specific models (like the Carnivean and his cousins) I've changed this process. When I do, I typically leave long pins sticking out the bottom of the base to attach it to the spray can.

So anyway, here's the base at about 75% assembled. I wanted to create a sort of mechanical laboratory feel to the base. The biggest chunk of work here was in casting out the metal plating. I searched high and low for textured plasticard that matched what I was looking for but found nothing. However while scouring my LGS, I came across a very large base (70mm) that had the right pattern and some InstantMold product. That evening I cast out the mold which was a piece of cake. Then I pressed in a bunch of black Milliput and I had exactly the patterned steel plating I wanted. Then it was just an arduous task of shaping it to a circle and carving out a square space in the middle. Once that was done I added the metal grill and additional metal pieces.

Here's the fully assembled base. It's now sitting in my garage as the primer dries. Today I'm hoping to get started painting it and drill out the necessary pin holes to mount the War Hog to it. With only 8 weeks left, I'm starting to feel the pressure to really get rolling on this project. Time to carve out some serious time and really paint like I have a pair!

Friday, March 11, 2011

RtC: Assembly Finished

Countdown to KublaCon painting competition: 78 days

Assembly is finished for the War Hog! The last of the work was just getting the tusks and right hand attached, and then doing a bunch of gap filling around some of the major joints. The places where his skin is stitched together required some particular attention. Normally I might have just skipped that gap filling and used dark washes to disguise the joins. For competition purposes though, I felt it was really important to fill those gaps properly. It stretched my green stuff skills a bit since those stitch joints were somewhat fiddly to fill in. However, that work is now done, so it's time to move on to priming next.

Speaking of priming, I read the recent NQ article about "underpainting" and it got me thinking as to whether that might be a good technique for this. However, never having used the technique before, I honestly have no idea. I'm planning to do a test model using that technique but I'd love to hear from other folks out there about it. Post your comments!

Ok, and now for something more life-related. Part of my lack of progress on painting the last month was due to this project. My father-in-law and I spent a bunch of time working on my back yard area. The pavers and deck are all new, and it was a ton of work. But the end result has transformed the space into something much more functional and tranquil. Anyway, now that this project is complete, I should be getting more painting progress done.

Now it's time to start working out color schemes for this beastie and get on task.


Wednesday, October 20, 2010

From the Desk: Forsaken Conversion, part the last

Another quick update on the Forsaken bodging. Or rather, a final update. I finished it off just now, with the exception of sealing it. I'm pretty happy with how this turned out for being a relatively quick project. My original concerns about proportions are completely gone now that it's fully painted. I won't get a proper picture up until my house guests leave and I can set my photo studio back up, so I wanted to get a quick picture on the blog.

On a different note, I picked up the Legion book today and having a second Forsaken has turned out to be fortuitous: Absylonia's tier list needs 2 of them, and now I'm all set!

Sunday, October 17, 2010

From the Desk: Forsaken Conversion, part 6

Another quick update on the Forsaken project. I got a bit more painting done tonight. The flesh is mostly done, and most parts are base coated now. At this point things should move along a little more quickly provided I can carve out painting time. I have to admit, now that I've got paint on the majority of the model the concern I had about the proportions is dramatically diminished.

Friday, October 15, 2010

From the Desk: Forsaken Conversion, part 5

I finally got my converted Forsaken primed and started on it tonight. Please note the special guest: Thrullg. Anyway, the painting so far is pretty minimal of course, but I wanted to go ahead and get a picture up, even if it's a terribly saturated picture.

I also wrapped up the pair of Stingers the other night, but we have family visiting and my photo setup is torn down while the guest room is in use for the next couple weeks, so they will just have to wait before I get pictures of them up.

Thursday, October 07, 2010

From the Desk: Forsaken Conversion, part 4

My new drill bits arrived and I wrapped up the assembly. The drill bits I got were not so great. Note to others: Make sure when you order bits online that they are rated for metal, otherwise you'll be drilling for a long time. However, no point whining about it now. I pinned everything together and did some minor greenstuff work. There's definitely some additional GS work that I'd like to do, but I need everything to set properly before I do anything further.

I snapped 3 pictures to give an idea of what it looks like from different angles. There's definitely some oddness to the proportions. There are really only 2 options to deal it: either resculpt it somehow, or paint cleverly. Since my skills are stronger on the painting side, I'm going to purposefully not try to adjust the proportions and see if I can use color to affect the appearance of the proportions.

The next step is to prime and paint, which may take a while for me to get to. However I will definitely post an update as I make progress.


Sunday, October 03, 2010

From the Desk: Chaos and Tragedy

Quick post to share the status of my desk. First, the tragic news: I broke my last smaller drill bit. I've been trying to find new bits for a while (and in fact have an order on its way currently), but I'm having a heck of a time finding a good source of micro drill bits that work well on metal. I was tempted to pick up the only set of bits at the local hobby store, but paying $15 for a set of bits that only had one in the whole set that I wanted seemed silly. So, work on the Forsaken bodging is on hold temporarily while I wait for the new bits to come in.

Now the chaotic news: This is a picture of what's currently on my desk. This is just the active stuff. Now normally I only work on 1-2 projects at a time (it's my process and what works for me). But somehow I got into a mode where I was working on a bunch of things all at once and some stuff started jumping ahead in the queue. The 2 Ravagores (partially assembled) jumped up in the queue so that I could have them for an upcoming Mangled Metal tournament at my LGS this coming Saturday. The Forsaken of course is an active bodging project. The Harriers and Stingers have been sitting in their current state for a couple weeks now (since I finished the Teraph). Corbeau has been in her state for even longer, and is in danger of getting demoted back into the storage container soon. The Sorceress was a recent assembly completion, even though I'm deluding myself into thinking I'll start painting her soon. And Thrullg is something I was hoping to just start throwing washes on, but again, mere delusion I suspect. Not pictured are a primed McBain, 3 Spell Martyrs, and a half assembled Absylonia which I have demoted off of my desk and back into the storage bin. I'm trying to stay purely focused on my Legion force just to stay focused, even though I'd love to start finishing out the lingering couple of models for all the other factions that I have.

Anyway, that's it for tonight. Apologies to those looking forward to the next installment of the Forsaken bodging. It'll probably be a few more days until I'm back to work on it.

Friday, October 01, 2010

From the Desk: Forsaken Conversion, part 3

Another small update before sleep claims me. Tonight I started putting pieces together. Well, just 2 pieces, but I wanted to use this step to provide a couple tips I've learned along the way. Now I should point out that I'm going to real extremes for pinning and joining here. The first tip is that it really helps to score the joining surfaces with a utility knife before putting them together. This creates a rougher surface which allows the greenstuff to really do its job. Here I've scored the surface of the legs as well as drilled a hole for a pin.

The next tip is to do a dry fit. With these pieces in particular it was helpful to do a dry fit and get an idea of how to line them up. I knew ahead of time that the scale of these pieces was off, but this helped me get an idea of how to deal with that. I decided that if I put the torso at an angle, I could offset the difference and create a slightly more dynamic look to the model. However I knew this wouldn't be a perfect fit no matter what I did. Hence I would need to do a little greenstuff work.

Now, you'll notice there's no green here. That's because I'm using the GF9 "grey-stuff" product for the first time. My first use of this seems to perform pretty much identical to greenstuff (and for the purposes of this post, I'll continue to refer to it as greenstuff). When doing this join, I initially used more greenstuff than necessary and then carved away the parts that I didn't need. I find this technique works best so that I'm not trying to add more as I go and having to smooth out the additions. The join here isn't great, and I may put a little further effort into sculpting in some details later, but I need this batch of greenstuff to dry before moving on.

Well that's enough for tonight, and I'm trying to get my Ravagores assembled so I'll hang up the tools for now and work on it some more over the weekend.

Thursday, September 30, 2010

From the Desk: Forsaken Conversion, part 2

I had intended to get work done on my Ravagores, but my dremel's battery was dead so while it charges I figured I'd get some more work done on the Forsaken conversion.

After trimming all the pieces, the first big step was to start cutting off what I didn't need. I took out my trusty jeweler's saw and cut away at Cylena, severing out her midsection. I decided to keep the belt and cut everything off below that. I had debated whether to keep the little waist-cape, but that would have required much more cutting for little gain. I also tried to cut her head off as close to the shoulder level as possible.

Next was the easy task of cleaning up unnecessary metal around the Forsaken head's neck as well as splitting up the spine into the pieces I needed. Note that the "spine" of the Forsaken sculpt actually forms the top and back of the head as well, so it was necessary to keep that top part. The bottom part of the spine turns into the tail which was, of course, quite necessary. I'm honestly debating making the tail longer with a minor amount of GS work, but I'll cross that bridge when I get there.

At this point it's starting to be possible to visualize where the project is going. Laying out the pieces I noticed a couple points of concern. First is that the midsection is noticeably smaller than the legs are, which will give some odd proportions. Second is that the arms look like they are going to work out quite well, provided that I pin them properly.

Ok, that's today's update. Not a huge amount of work, but this step really helped me to get a handle on where this is headed. I should note that although there's no picture here, I went ahead and GS'd the head and spine top together to get a jump on that bit of work. Next time I plan on focusing on getting the torso and legs put together.


Wednesday, September 29, 2010

From the Desk: Forsaken Conversion, part 1

When I first decided to start building a Legion list, I was only focused on models that I really honestly wanted to paint. Then I started playing Legion more seriously and started to pick up models that I was less interested in painting due to their need on the battlefield. The Forsaken quickly came up as a necessity for Fury management. However the sculpt leaves much to be desired for me. I'm not a fan of the static pose making him look like a 1920's gentlemen vampire. Hence I began hatching a plan to bodge together my own version of a Forsaken. This is the first in a series of posts on this bodging project.

The first step was to figure out how to construct my alternate Forsaken. I didn't want to do much sculpting myself so I went to the PP parts store and started searching around. Today my resulting bits order arrived. Now I should note that according to the PP conversions policies, I'm borderline at best and may have picked bits that will not actually qualify as a legal conversion, but I tried to follow the spirit of those rules.

I decided to keep the claw arm from the original model, along with the head and the spine. The spine will likely get cut up into pieces though. For the wing arm, I opted to use Absylonia's wing arm. For the legs, the Incubi lower body was a great swap since it kept the feet in the same style as the original Forsaken. That left me with the challenge of a torso. I wanted to find a female torso, so that quickly limited my options. I wanted to find something in a similar style to the normal blighted Nyss so that it matched the army. Cylena fit the bill nicely, although it will require some serious cutting and chopping to make it work.

Well, that's enough for this first post. I'm juggling multiple projects, but hopefully I can stay on this one to keep the updates rolling.


Tuesday, June 01, 2010

From the Desk: Angelius Repairs

I'm still wrapping up the Angelius, and in fact ended up using him for the 15pt Mangled Metal tournament at KublaCon despite it not being finished and sealed. Amazingly, he came through completely unscathed and didn't tip over once! That later point is something I'm very happy about from a usability point of view. However, he still had a structural weakness at the join between the upper body and the tail that connects to the pillar. So, in order to address the issue, I decided to bite the bullet and re-work it.

The structural weakness was specifically between the main body part and the small piece that I kept from the original sculpt. The join between that piece and the body extension that I sculpted is rock solid, and continues to stay joined securely to the pillar. The first step was to drill a second hole for another pin to more secure the two pieces. Next, the original join was a little gnarly with green stuff and it removed the illusion of a nice smooth flying snake, so I filed that down smooth. There was also a couple places where the sculpting of the body extension wasn't smooth, so I carved those down smooth. Lastly, there was some roughness to a portion of the sculpted body next to the pillar (probably due to glue issues) so I carved those down smooth as well. Now, once my paint-on primer order arrives, I'll go about repairing the paint job.

This is the first time I've done a major amount of repair work on a model that was practically finished. It was a little terrifying to start carving, but once I got started I realized that I wasn't hacking up anything that would be overly hard to fix. And in fact, I think this will be a good exercise for me to try color matching on the pieces that need to be repainted.

Monday, May 03, 2010

From the Desk: Angelius Conversion Work

The Angelius is a breathtaking beast to behold, but the pose of the sculpt lacks a certain degree of action deserving of such a creature. I'm sorry, but it's true. The only time he'd be "sitting" on the ground is when he's sleeping. I wanted to do a little conversion work to better reflect this full-time flying pose. To that end I did this bit of conversion work. Despite being a relatively simple change, it took me a frightful amount of time due to my lack of conversion experience. Unfortunately I didn't take any in-progress shots, but it's pretty easy to figure out how I did it.
First I started with a wedding cake pillar from a craft store and packed it with leftover tabs removed from models and secured it with green stuff. I then attached it to one of the metal PP bases. My reasoning here was that with an increased model height, I needed to put far more weight on the base to help compensate. Next I cut out the coil piece from the body of the Angelius and put a brass rod in place to re-join the two pieces at an appropriate length and curve. Next I put in some Milliput, dremelled that down appropriately after it cured, and then refined the gaps with green stuff. The remaining work mostly amounted to filing, smoothing, and pinning the re-sculpted body piece to the pillar to secure it.

Bing bang boom, and there he is, ready to be primed. He's not exactly "epic", but he's a little more exciting than before and I'm pretty happy. One side note is that I probably should have put magnets into the base before doing the final attachment, but hey, being smart is overrated.

Tuesday, January 26, 2010

Templar Kit Project - Part 2

Assembly:
There's a good guide in No Quarter #24 for assembling the Bastion kit which I made sure to refer to beforehand. Really there's nothing amazing to note except for using regular superglue instead of that nasty plastic-melting bonding agent that a lot of other kits need.

In terms of pinning, there wasn't much needed. Being lighter, the plastics are a lot more resilient to popping apart. However, being neurotic like I am, I decided to pin a couple spots. The dremel makes very quick work of this step so pinning effort is almost zero. The biggest risk is not accidentally drilling all the way through the piece since the plastic is so much softer.

For this kit, there are 3 heads. I thought briefly about magnetizing the heads so that I could swap them out, however that just sounded like way too much work for so little benefit. To that end, I opted to just use the Templar's head, since that's the model I bought the kit for. I think it is nice that they included all 3 heads.

Magnets:
Now it's time to talk about magnets. This was a pretty tricky proposition for me since I'd never magnetized parts of a model before so I knew this was going to be an adventure. I made sure to pick parts from the Crusader and Vanquisher to do first in case I trashed something in the process. Fortunately I already had some magnets left over from previous orders, so I got drill bits that matched the diameter of the magnets. Then I broke out the power drill. Not the dremel. The power drill. Talk about scary! I hand-drilled a pilot hole with my pin-vise drill and then proceeded to use the big drill. It worked out pretty well overall. In a couple situations I had to green-stuff things back together, but for the most part it worked well.

It took me a couple hours of messing around and carefully drilling and assembling, I got magnets into all the places I needed. Everything holds together quite well, especially since the magnets I used were probably more powerful than I really needed. There were a couple of key challenges:

First, the shield was a real pain in the ass to get on there. I ended up pinning paperclips into the hand (since they are ferrous) and then putting 2 magnets on the back of the shield. It sort of works, but the shield doesn't hold in an angle that looks good.

Second, the left arm (that holds the shield) has a tendency to swivel a bit. It's a result of the way the magnets are in place and their polarities.

So, given those two issues, I'm thinking that probably my solution will be to put a pin in to keep the pieces straight with just one end of the pin glued in.

Well, that's the progres so far. Here's a picture of the Templar configuration assembled. Next step will be to add those final stabilizing pins and then get him primed. He's definitely not going to be ready for the Resurgence tournament at my LGS this weekend. Overall I'm fairly happy with how the magnetizing is working out. I'd like the model pieces to fit together a little tighter, but given this was my first attempt at it I can't complain too much. If there are questions out there about the plastic kit in general feel free to post comments and I'll respond.


Sunday, January 24, 2010

Templar Kit Project - Part 1

Ah... Sunday Afternoon! Time to sit down at the painting desk, put on a WM podcast episode, and start a new project. This last week I bought my first PP plastic kit: the Protectorate Heavy Warjack kit. There's a lot of controversy about PP going with plastics, and I figured I'd provide my own perspective by actually walking through my assembly and painting of this kit. My goal here is to review the benefits and drawbacks of plastics. I should note that long ago I played Warhammer 40k (15+ years ago), and so I'm familiar with old plastic kit bashing, so I'm not a neophyte in this arena. However I also have a certain preference for metal models.

Please note that I'll be writing these posts as I'm actually doing the steps I'm writing about, so it may be a little disjointed.

The Product:
My first impression of the kit is pretty favorable. It includes all the parts to build a Vanquisher, Crusader, or Templar. It also includes the cards for all three. The plastic parts are all in a series of connected plastic bags. Everything is packaged so that it's easy to review that all the parts are there. As you can see from the picture, it's mostly the same parts for all 3 jacks with the exception of the arms/hands and heads. It didn't take me more than about a minute to decide to magnetize the arms. It should be pretty easy to do it and it's a project I've wanted to try for quite a while now.

Detail-wise, I was a bit concerned about the pieces. I grabbed my Crusader and Vanquisher from the display case to compare parts. Overall, I can't say the detail level is noticeably lower. There's pieces that seem less detailed, and others that seem more detailed. The plastic pieces definitely have the option of sharper edges, whereas metals don't seem to support that. My impression on this kit is that any reduced detail level is more a reflection of the sculpting and not the material or casting method. I'll be curious to see other kits.

Trimming:
Trimming the plastic parts is pretty easy. As opposed to metals where I almost entirely use micro-files, for these I entirely used a hobby knife. In general these seem to be relatively few mold lines, but that's typical for a new kit. I definitely found that it was harder for my eye to pick out the mold lines on these plastic pieces, primarily due to it being a material I'm not used to. However the hobby knife definitely makes quick work of mold lines and trimming went pretty fast. I will say that the mess factor of plastics is different. With metals, there are lots of little flakes and filing which have their own challenge to clean up. Plastics tend to create little strips and being light, their static electricity makes them stick to things.

I also used this opportunity to try the hair-dryer trick. Sho'nuff, it works like a charm. I took the Vanquisher flail hand attachment and held the chain under a hair dryer. After a few seconds I could see it bend by gravity alone. At that point I turned off the hair dryer and held it in the position I wanted it to stay in. I blew lightly on it to cool it back down and viola! Very easy I must say.

Well, that's enough for today. Next time I'll cover the assembly, since that will turn into a pretty large step. I'm include the magnetizing as well most likely.

Thursday, October 15, 2009

Avatar Assembly Finished

Assembly finished! I'm not going to get super detailed here on my pros and cons, but just some quick notes.
* I'm happy with how he has more of a presence. He's tall and in charge.
* He's a little thin in places. It sort of makes him look spindly, but we'll see how that looks after I finish painting him.
* The pose is much better. It's more dynamic, and conveys more motion.
* The effort involved wasn't overwhelming. Despite my busy schedule, I was able to complete this fairly quickly, given my skill level at conversion work.

Now, as soon as the weather changes and the humidity goes down, I can prime him and get started painting!