Lance and I had our first Showdown battle of our 350pt lists!
Me: Witches, Skarlock, Rengrave, Revenants(7), Harrower
Lance: Old Witch, Berserker, Doomreavers, Manhunter, Yuri
Let me first say that when 8 weaponmaster advance deploy on you in a 350pt game, it's rather intimidating. However, my cantankerous band of Cryxians was up to the chore. The Revenants did alot of shooting, and then alot of dying, and then alot of coming back to (un)life, but overall did a good job of blocking and clearing out the doomreavers. Then they got a charge on the Berserker and their deathstrokes took it out. The Harrower took out the Manhunter and Yuri (with some assistance from the Witch's Imprison to space them out), which gave it soul tokens to experiment with it's gun later on. The Witches were excellent support in this game, but Rengrave stole the show, pressing 3 Doomreavers into the service of his Revenant Crew. In the end, the Old Witch got unlucky with an attempt to assassinate one of the Witches, and then that Witch turned around and stabbed the old bag. I have to say, being on the delivery end of Cryx was very entertaining.
One thing is for sure, with Rengrave on the table, I need to make up some more Revenant models to have on hand for when he presses dudes into service.
Wednesday, June 18, 2008
Tuesday, June 17, 2008
From the Painting Desk: Showdown Update on Witches
Just a quick update while I have a few minutes. The Witches are almost done now (except for Egregore which is not even assembled). I decided to go fully NMM with them, and so far the results are not terrible. Actually, I'm quite happy with the look myself. They aren't top notch quality for me, but overall this whole experimenting with washes thing is going great. A major departure here for me was using white primer for them to make the armor washing easier to get rolling.

As for the Painting Showdown status, model-wise I'm doing pretty well, but work-wise, I still feel behind. Even if I finish painting the witches tonight, I'll still have a ways to go. I added a Showdown Status listing to this page to keep track of where I'm at easier. It's going to be pretty rough getting the remaining 4 models all done in 12 more days. Not to mention that I've got a 1000pt game on Monday that I need to prep for still. I will say though, the showdown is keeping me very focused on painting and getting stuff done. Even though I'm doing alot of experimenting, it's more focused on speed painting techniques, so I'm still cranking through pretty fast.
As for the Painting Showdown status, model-wise I'm doing pretty well, but work-wise, I still feel behind. Even if I finish painting the witches tonight, I'll still have a ways to go. I added a Showdown Status listing to this page to keep track of where I'm at easier. It's going to be pretty rough getting the remaining 4 models all done in 12 more days. Not to mention that I've got a 1000pt game on Monday that I need to prep for still. I will say though, the showdown is keeping me very focused on painting and getting stuff done. Even though I'm doing alot of experimenting, it's more focused on speed painting techniques, so I'm still cranking through pretty fast.
Sunday, June 15, 2008
Revenant Crew
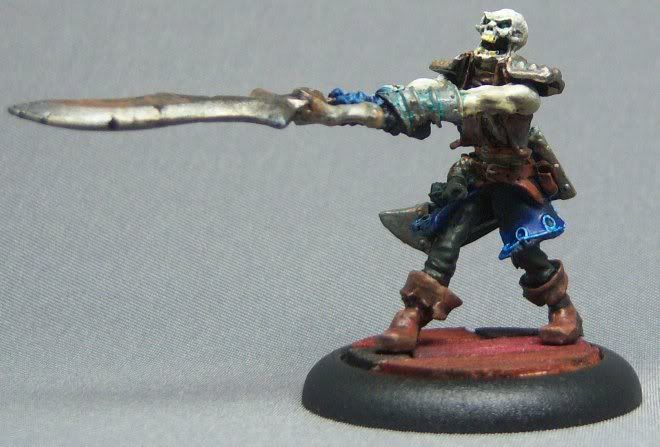
And now... undead pirates! I finished these guys yesterday morning, but with Father's day going on, I didn't get a chance to post sooner. These were a blast to paint. They represent a significant departure from my standard painting techniques. I used alot of washes, and some pseudo-NMM techniques. These were relatively speed painted. I've found that using washes is not only a very quick technique, but coupled with 2-brush-blending can produce pretty decent results with alot less effort. I'm dedicated to continuing to use these techniques for the rest of the Cryx models that I plan on painting.




Tuesday, June 10, 2008
Showdown Woes
Well, I didn't finish the Revenant Crew on the weekend. I still have 2 left. I'll definately finish them before this coming weekend, but I still feel behind schedule. It's going to be rough getting 350pts fully painted within a month. I'm not giving up though. If I can finish the Revenants and Rengrave by the end of the weekend then I'll be about halfway done (model-wise) and will feel more on track. Here's some planning updates in the meantime:
I've primed the Witches in white! *GASP* I labored over this for the last few days and finally decided to just try it out. I'm heavily experimenting anyway with these Cryx models so why not do a little more experimentation. The white base will make painting healthy looking skintones easier probably. All things considered, they should go pretty fast. I haven't used white primer in a while, so this will be a good re-learning experience.
I started assembling the Harrower. This thing is crazy. 13 pieces, and with it's big long spidery legs, it's going to be a real challenge to get on a base. I need to just keep tinkering with it over the next week. I'll inevitably end up painting it in pieces.
The Egregore is going to be a serious experiment for me. I'm going to the game store today to pick up some rare earth magnets and I'm going to make an honest attempt at making it float. I'll post more about that later once I get a prototype put together.
Well, that's it for this morning. Hopefully this will be a productive week for painting and I can get back to something that feels "on schedule" for being done by the end of the month. The great thing is, I'm already thinking about the next round of painting and what sort of models I want.
I've primed the Witches in white! *GASP* I labored over this for the last few days and finally decided to just try it out. I'm heavily experimenting anyway with these Cryx models so why not do a little more experimentation. The white base will make painting healthy looking skintones easier probably. All things considered, they should go pretty fast. I haven't used white primer in a while, so this will be a good re-learning experience.
I started assembling the Harrower. This thing is crazy. 13 pieces, and with it's big long spidery legs, it's going to be a real challenge to get on a base. I need to just keep tinkering with it over the next week. I'll inevitably end up painting it in pieces.
The Egregore is going to be a serious experiment for me. I'm going to the game store today to pick up some rare earth magnets and I'm going to make an honest attempt at making it float. I'll post more about that later once I get a prototype put together.
Well, that's it for this morning. Hopefully this will be a productive week for painting and I can get back to something that feels "on schedule" for being done by the end of the month. The great thing is, I'm already thinking about the next round of painting and what sort of models I want.
Saturday, June 07, 2008
From the Painting Desk: Showdown Update on Pirates
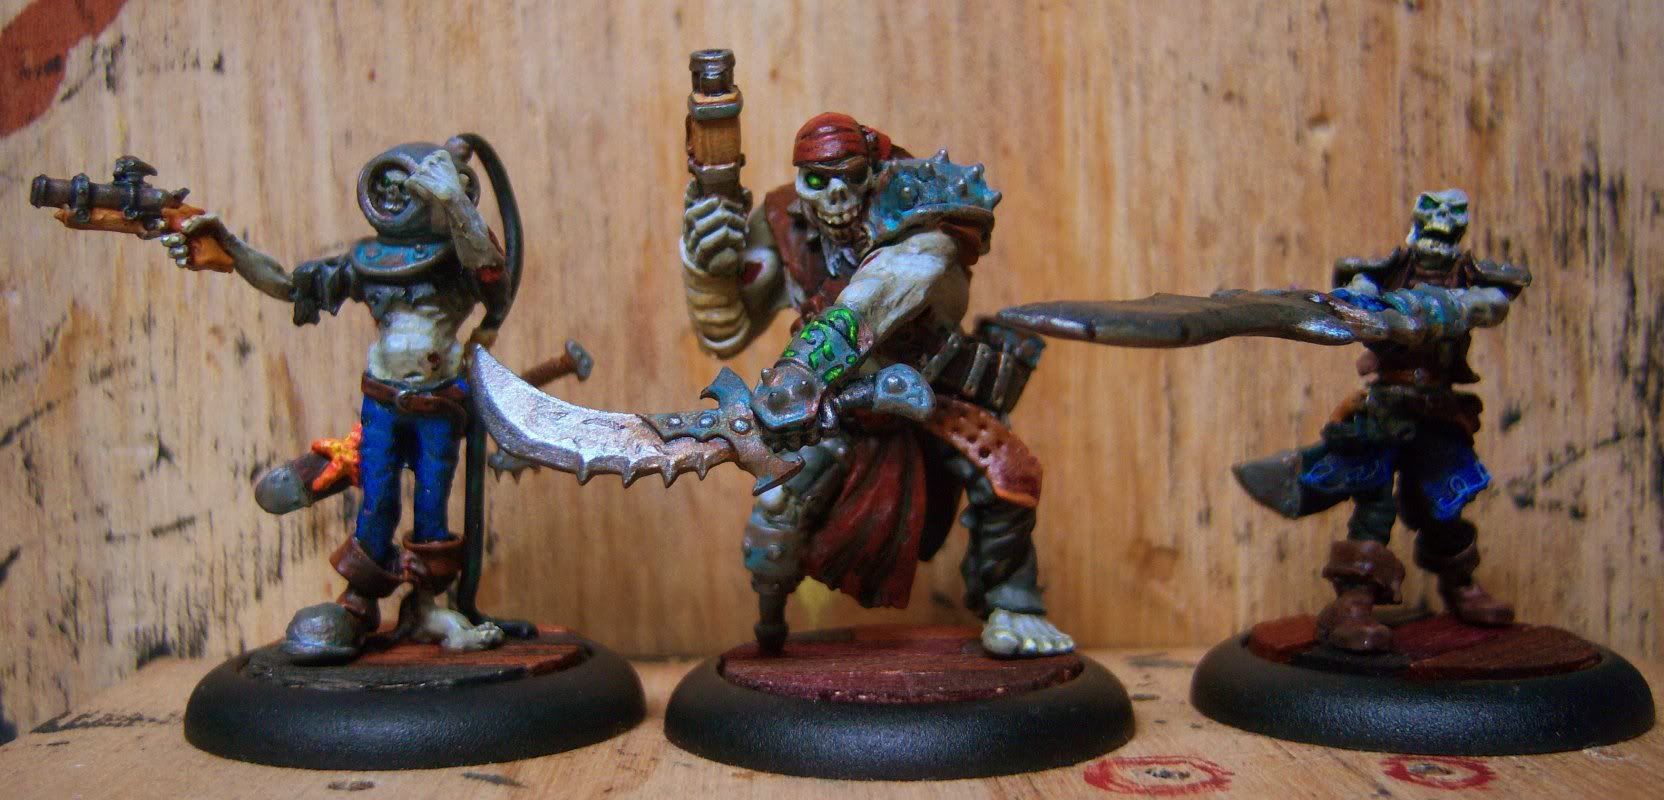
Well, I'm over halfway through the Revenant Crew now. 3 are complete and the other three have metals and flesh all done. Below is a terrible pic, but it gives a rough idea. The painting style on these is a noticable departure from my normal style. I'm experimenting alot more with washes and alternate color schemes when blending. I've also tried to use inks a bit more here as well.
I'm hoping that if I can get the Revenants done tomorrow, I'll be on a good pace to finish all 350 points of models before the end of the month without too much trouble. I even squeezed in a game last night against Lance!
I'm hoping that if I can get the Revenants done tomorrow, I'll be on a good pace to finish all 350 points of models before the end of the month without too much trouble. I even squeezed in a game last night against Lance!
Monday, June 02, 2008
And now for something new... The Painting Desk
The following are a pair of pictures of my test model. I've had this model for a while and it has many many layers of paint on it at this point. I use it for experimenting with new color combiations and painting techniques. Typically ones that I'm not willing to throw on a new model. Eventually I'll need a new test model, but this one has proved sufficient up till now.
Today's experiment was with oxidized/rusted metals. I tested these out on the sword blades. The top one follows fairly closely a tutorial from the Brushtralls site on NMM oxidized bronze. The lower one is just a concoction of my own creation. I'm thinking of using these techniques for the metals on my Cryx models. For my own reference, here are the two techniques:
Top blade: base Menoth White Highlight, thick wash Rucksack Tan, thin wash Sanguine Base, thin wash Battle Dress Green, very thin wash Umbral Umber, thin wash Arcane Blue (in selected places)
Bottom blade: base coat Cold Steel, wash Bloodstone, thin wash Vallejo Smoke, stipple with Khador Red Highlight, edging/blending Pig Iron


Today's experiment was with oxidized/rusted metals. I tested these out on the sword blades. The top one follows fairly closely a tutorial from the Brushtralls site on NMM oxidized bronze. The lower one is just a concoction of my own creation. I'm thinking of using these techniques for the metals on my Cryx models. For my own reference, here are the two techniques:
Top blade: base Menoth White Highlight, thick wash Rucksack Tan, thin wash Sanguine Base, thin wash Battle Dress Green, very thin wash Umbral Umber, thin wash Arcane Blue (in selected places)
Bottom blade: base coat Cold Steel, wash Bloodstone, thin wash Vallejo Smoke, stipple with Khador Red Highlight, edging/blending Pig Iron
Sunday, June 01, 2008
Studio Showdown, Local Style
Inspired by the Studio Showdown articles in issues 17 and 18 of No Quarter, I've decided to follow suit and try to paint 1000 points of Cryx over the next 4 months. Given my life schedule (and getting sick with the flu today) this is going to be a tall order. However, I've convinced a couple buddies to join me in the showdown for moral support.
For my own showdown, I've got a couple tweaks to the parameters:
* First, all models are to be selected based on being interested in painting them. This is not about fielding a kick-ass rules-based army. It's about fielding a kick-ass looking army. Left to my own devices I'd keep working on pirates and protectorate due to my completionist mentality. However there are some majestic Cryx models that I'd love to paint, so this gives me the perfect excuse to do so. It may not end up being an effective force, but I'll have a great time painting it.
* Second, all models within the faction. No mercs to fill out the force.
As for a schedule, here's the plan:
June: base 350pts, 1 caster
July: additional 150pts, plus 1 more caster
August: additional 250pts, plus 1 epic caster
Sept: additional 250pts, plus 1 more epic caster
For my first 350pts, I've selected the Witch Coven (85pts), Capt Rengrave (28pts), 6 Revenant Crew (77pts), a Skarlock (16pts), and a Harrower (125pts). This gives me 331pts which technically leaves enough room for a necrotech and 2 scrap thralls, but I've left them off because I'm not particulary keen on painting them and will probably use the 19pts for something else in the next round.
Well, time to get crackin here. I've got alot of painting to get done!
For my own showdown, I've got a couple tweaks to the parameters:
* First, all models are to be selected based on being interested in painting them. This is not about fielding a kick-ass rules-based army. It's about fielding a kick-ass looking army. Left to my own devices I'd keep working on pirates and protectorate due to my completionist mentality. However there are some majestic Cryx models that I'd love to paint, so this gives me the perfect excuse to do so. It may not end up being an effective force, but I'll have a great time painting it.
* Second, all models within the faction. No mercs to fill out the force.
As for a schedule, here's the plan:
June: base 350pts, 1 caster
July: additional 150pts, plus 1 more caster
August: additional 250pts, plus 1 epic caster
Sept: additional 250pts, plus 1 more epic caster
For my first 350pts, I've selected the Witch Coven (85pts), Capt Rengrave (28pts), 6 Revenant Crew (77pts), a Skarlock (16pts), and a Harrower (125pts). This gives me 331pts which technically leaves enough room for a necrotech and 2 scrap thralls, but I've left them off because I'm not particulary keen on painting them and will probably use the 19pts for something else in the next round.
Well, time to get crackin here. I've got alot of painting to get done!
Eiryss (alternative sculpt)
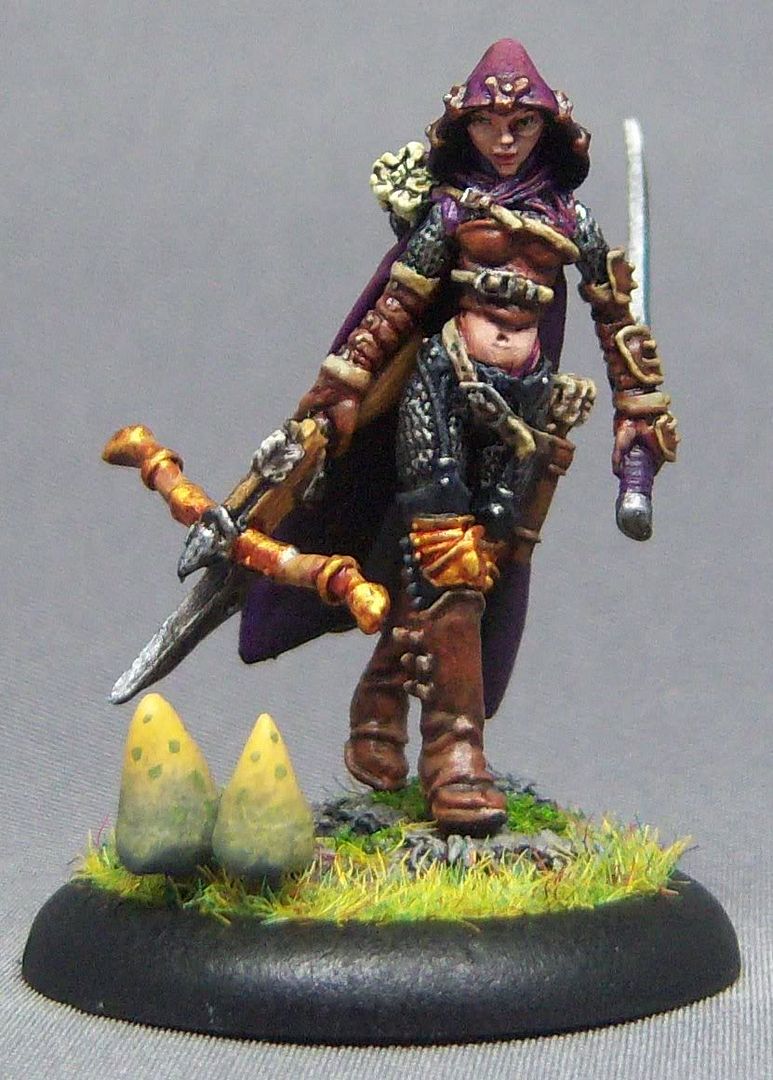
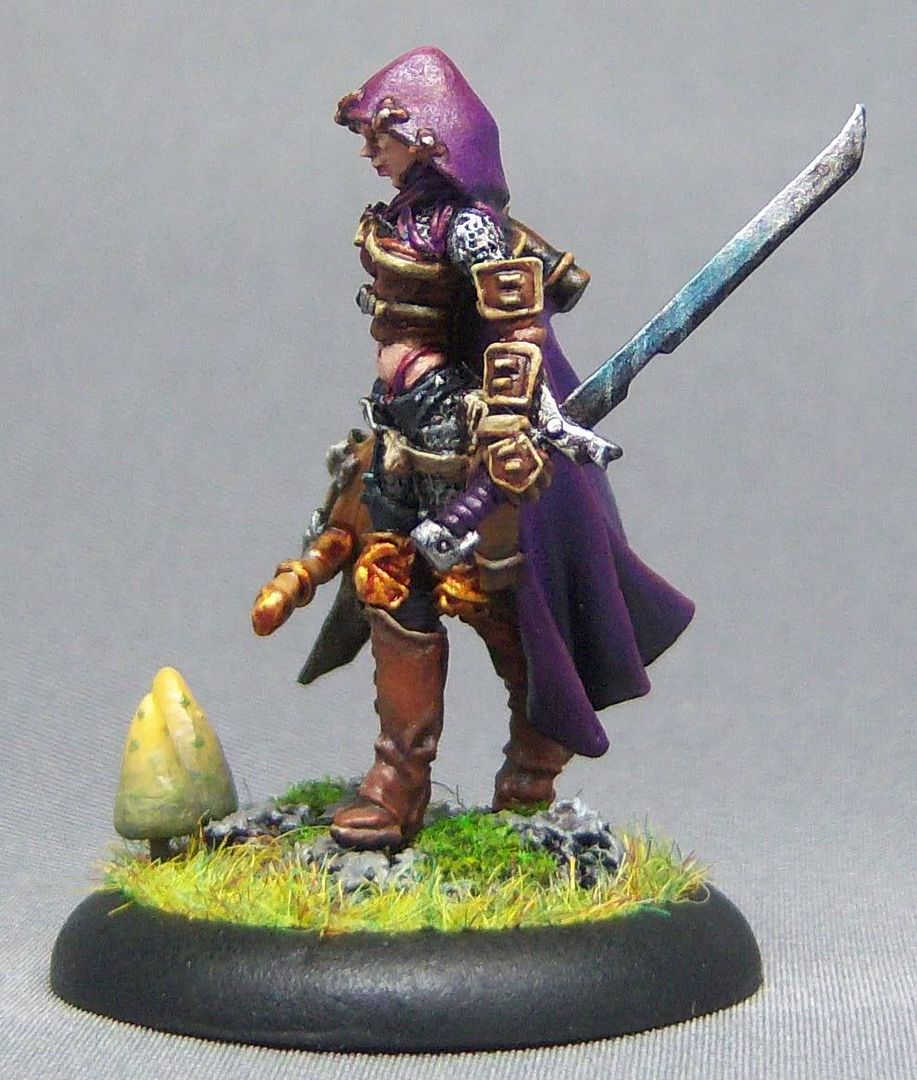
Fresh on the heels of Kubla, here's Eiryss, in all her alt sculpt glory. There are 3 key things here that I tried out that I had not done before:
1) The cloak (although hard to tell in the photo) was a big experiment for me. I tried out a technique of using a warm red tone on the upper highlights, and deep blue tones for the shading. The purple made this an easier exercise, but the effect was rather intriguing. It gives the cloak a strange sort of color effect that I'm still not sure how to characterize, but I do like it. The cloak has a much more dynamic color to it as a result.
2) The blade got a litle extra attention. I used some blue highlights along with working the metals in my normal way, thus creating more of a hybrid between metal and NMM effect. Not particularly good, but an interesting experiment none-the-less.
3) The mushrooms were just a random experiment. I'd seen them on bases before and decided to give them a try here. They turned out ok for my first try. I may have to search around for a tutorial to see if I can gain any additional tips.
Overall, a fairly pleasurable model to work on. The face came out unusually well for my skills which I am stoked about.

1) The cloak (although hard to tell in the photo) was a big experiment for me. I tried out a technique of using a warm red tone on the upper highlights, and deep blue tones for the shading. The purple made this an easier exercise, but the effect was rather intriguing. It gives the cloak a strange sort of color effect that I'm still not sure how to characterize, but I do like it. The cloak has a much more dynamic color to it as a result.
2) The blade got a litle extra attention. I used some blue highlights along with working the metals in my normal way, thus creating more of a hybrid between metal and NMM effect. Not particularly good, but an interesting experiment none-the-less.
3) The mushrooms were just a random experiment. I'd seen them on bases before and decided to give them a try here. They turned out ok for my first try. I may have to search around for a tutorial to see if I can gain any additional tips.
Overall, a fairly pleasurable model to work on. The face came out unusually well for my skills which I am stoked about.
Saturday, May 31, 2008
KublaCon 2008 Recap
Well, Kubla was a great time. I'm not going to "tell you all about my character" here, but I will recap the things I got to participate in.
Painting clinic - I went to a clinic by Laszlo Jakusovszky on blending techniques. I can't say I walked out with a completely new set of techniques to work on, but I did realize that I'm using all of the major blending techniques and just need to keep practicing. Some minor tips that I did get that I intend to try are:
Warmachine tournament - I came in nearly dead-last, but I had a wonderful time playing. I lost 3 out of 4 games, and most of those were due to just playing too boldly. I hate hanging back and not getting into a scrum, and it ends up being my downfall in most tournament battles. However it was a good time, and multiple opponents did thank me for playing agressive like that saying it was more fun than camping and trying to snipe vp's.
Warmachine pickup games - I played an additional 3 pickup games which were all very very entertaining. I especially enjoyed playing against Mortenebra for the first time.
Painting competition - This was the whole purpose in going for me. I entered the Freebooter, Gudrun, and a squad of pirates. Gudrun (of course) did not place as the competition in the single fantasy category was vicious. The Freebooter I suspect pulled in at 4th unfortunately for the large fantasy. However the pirates pulled off a 3rd place for fantasy squads! I'm pretty stoked about that overall (even though the competition was not as heavy in that category). Below are pictures of the pirates on their transport platform along with the trophey.
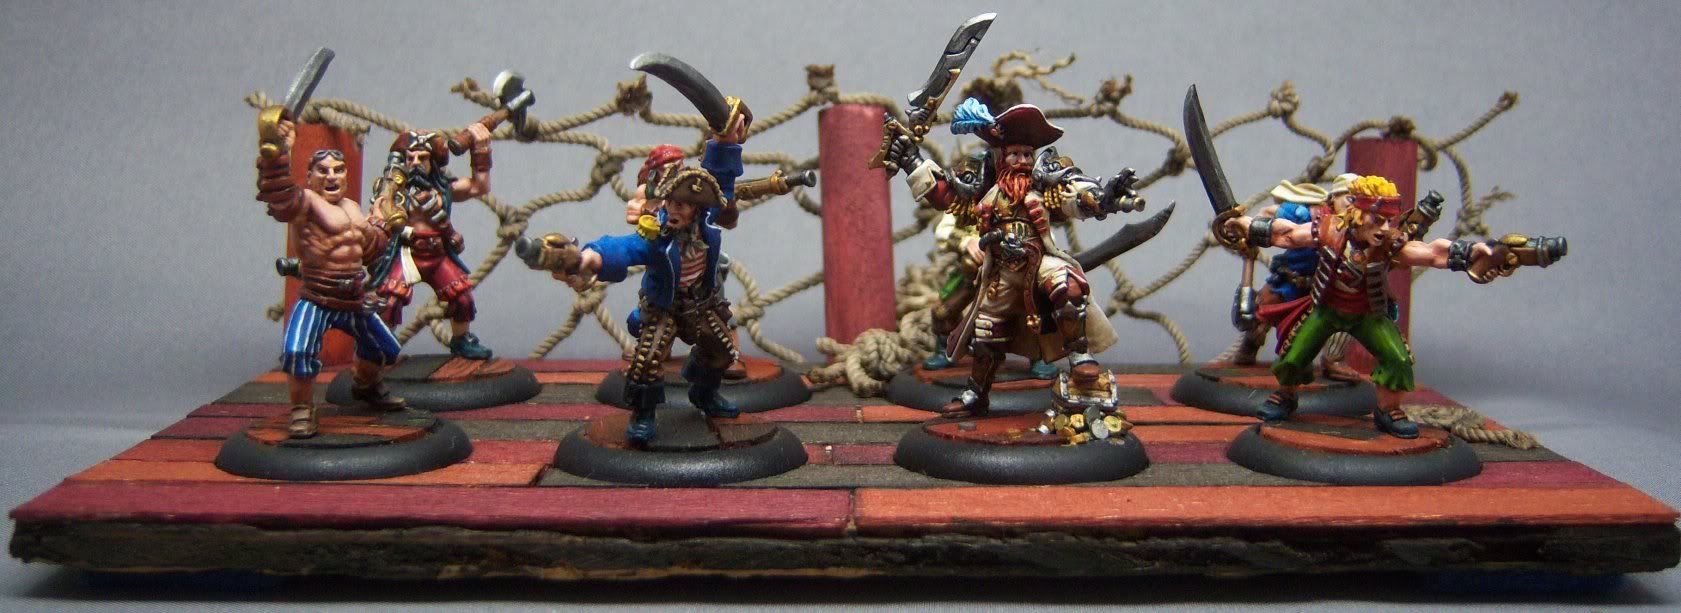
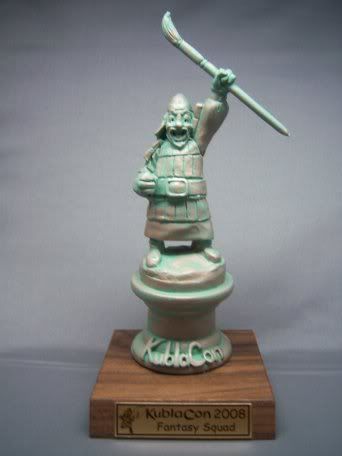
Overall, Kubla was a great time. It was an incredibly relaxing weekend and I especially enjoyed seeing other models in the competition to get an idea of what I need to aim for next year. Also, by simply entering, I really feel like I'm serious about my painting.
- Using lint-free cloths for cleaning
- Using straight flow-aid to thin paints when blending
- A different technique for unloading brushes when drybrushing
Overall, Kubla was a great time. It was an incredibly relaxing weekend and I especially enjoyed seeing other models in the competition to get an idea of what I need to aim for next year. Also, by simply entering, I really feel like I'm serious about my painting.
Wednesday, May 28, 2008
Gudrun
Well, here was my primary entry for KublaCon. I didn't win (more about that later) but I'm still incredibly happy with how he turned out. I spent a ridiculous amount of time working on him (for my normal time investment).


I'm sort of still in a bit of a painting funk, mostly because work has been intruding on my personal life alot, along with other personal things getting in the way of painting. However, plans are in motion to get myself back on the painting track very soon.
I'm sort of still in a bit of a painting funk, mostly because work has been intruding on my personal life alot, along with other personal things getting in the way of painting. However, plans are in motion to get myself back on the painting track very soon.
Wednesday, May 14, 2008
Temple Flameguard
Well, it took about 2 weeks, but I got all my Temple Flameguard painted. Paintined 12 models at once is downright soulcrushing. I used these as an opportunity to practice my two-brush blending technique alot more, and I must say the practice helped. I have a better grasp of how to use it on smaller areas now, and can definately blend paint straight from the pot now. These aren't the best quality paint job (just tabletop standards) but it saved alot of time using basic colors from the pot and using the two-brush technique. I'd say it took just as much time to paint the metals as to do the blacks and reds combined.

Sunday, April 27, 2008
KublaCon Prep
I finished my primary model for KublaCon this weekend. All sealed, based and ready to go. Of course, no pics here yet. It was relaxing though to put on that last coat of dullcoat and have it dry without problems. I was stressed that after all the painting time (probably 25+ hours) the sealing coats would wreck it.
Now on to more mundane tasks. I've got a full squad of TFG sitting on my desk now, assembled, primed and ready to receive some color. I've promised myself to use them as two-brush blending practice primarily, regardless of how their quality turns out. It'll take me a while to get through them anyway, so I might as well practice the two-brush technique in hopes of learning to paint faster to the quality that I desire.
I was also bad and picked up some more models the other day. A couple trolls, and Captain Rengrave. I've decided to do a 350pt Cryx army and challenge myself to do it in 30 days. I'm not starting it until after KublaCon though since there will be several interruptions before then.
Now on to more mundane tasks. I've got a full squad of TFG sitting on my desk now, assembled, primed and ready to receive some color. I've promised myself to use them as two-brush blending practice primarily, regardless of how their quality turns out. It'll take me a while to get through them anyway, so I might as well practice the two-brush technique in hopes of learning to paint faster to the quality that I desire.
I was also bad and picked up some more models the other day. A couple trolls, and Captain Rengrave. I've decided to do a 350pt Cryx army and challenge myself to do it in 30 days. I'm not starting it until after KublaCon though since there will be several interruptions before then.
Monday, April 21, 2008
The Funk
No, I haven't given up on this blog. There's been a whole pile of things going on. Work has been rather intense, my parents came to visit, and I've been working on my entry for KublaCon. I'm not going to post anything about it until after the con though. Here's a quick update though:
My Dad bought me a new lightbox. It's very nice. It collapses down into a very compact form, comes with 2 lights, and a tripod. It also has a perfect gray background as well. Here is a link on Amazon for it since I don't have any convinient photos at the moment.
I also spent some time messing around with Google's Picasa over the weekend. Going forward I will probably start using it (and Picasa web) for managing my photos. The big question is, should I just leave the photobucket album there, or move everything over to maintain a single account? Lots of work, but I've become rather OCD about having as few accounts as possible.
My Dad bought me a new lightbox. It's very nice. It collapses down into a very compact form, comes with 2 lights, and a tripod. It also has a perfect gray background as well. Here is a link on Amazon for it since I don't have any convinient photos at the moment.
I also spent some time messing around with Google's Picasa over the weekend. Going forward I will probably start using it (and Picasa web) for managing my photos. The big question is, should I just leave the photobucket album there, or move everything over to maintain a single account? Lots of work, but I've become rather OCD about having as few accounts as possible.
Saturday, March 29, 2008
Fiona the Black
So this model gave me a little inspiration to try something different. I had seen a post on the PP forums of a very cool Skarlock by DeadDogg. He used purple as an undertone in all portions of the model. This was an interesting idea to me, but something I'd never tried before. So, here's my attempt at it...


I used purple in almost everything. The metals got washes tainted with purple ink. The whites have just a touch of purple paint in them. Only the skin and hair were not blending with at least a touch of purple. The blending could have been a little better on the side cloak, but I'm pretty happy with the back of the coat.
I had thought about putting runes on the cloak, but in the end decided against it. Mostly the problem was that I wanted glowing rules, and that would have required using another color that would have good contrast. That just went against my goal for the model, so I abandoned that idea and went ahead and sealed it tonight. Perhaps the next model will get to have runes.
When I first bought this model, admittedly I bought it more for the game stats. But after I started painting it, I really enjoyed the asymmetry of the model and found it to be an intriguing challenge.
I used purple in almost everything. The metals got washes tainted with purple ink. The whites have just a touch of purple paint in them. Only the skin and hair were not blending with at least a touch of purple. The blending could have been a little better on the side cloak, but I'm pretty happy with the back of the coat.
I had thought about putting runes on the cloak, but in the end decided against it. Mostly the problem was that I wanted glowing rules, and that would have required using another color that would have good contrast. That just went against my goal for the model, so I abandoned that idea and went ahead and sealed it tonight. Perhaps the next model will get to have runes.
When I first bought this model, admittedly I bought it more for the game stats. But after I started painting it, I really enjoyed the asymmetry of the model and found it to be an intriguing challenge.
Sunday, March 23, 2008
Aiyana
Well, I can't say I'm entirely pleased with this model. It spen a ridiculous amount of time looking aboslutely terrible on my desk. I ended up somewhat rushing it at the end to just get done. For some reason I spent the last week pretty unmotivated about painting at all and this model unfortunately took the brunt of that frustration. It's a lovely model, and I probably would have enjoyed it at a different time.


The pink was especially challenging to work with. I'd never really worked with pink before, and using it on such a large flowing area. However I learned alot about working with it, plus I picked up another tip from the PP forums on two-brush blending that I think will help me in the future once I can get enough practice. Basically, the trick is to put a fairly good size glop of paint down first, then blend it with the second brush. The first brush shouldn't be used to do any sort of blending or placement of paint. We'll see if I can get the hang of that in the future.
The pink was especially challenging to work with. I'd never really worked with pink before, and using it on such a large flowing area. However I learned alot about working with it, plus I picked up another tip from the PP forums on two-brush blending that I think will help me in the future once I can get enough practice. Basically, the trick is to put a fairly good size glop of paint down first, then blend it with the second brush. The first brush shouldn't be used to do any sort of blending or placement of paint. We'll see if I can get the hang of that in the future.
Friday, March 14, 2008
Reinholdt
Reinholdt was a total speed paint job. Probably under 5 hours, which for me is pretty fast. Nothing amazing here. I spent most of my effort on the skin, trying to produce a highlighting tone that looked fleshy instead of just brighter. Like I said though, nothing special here. My photo quality has diminished a bit, but hopefully I will be able to correct that before long.


I've been spending alot more of my time lately getting models prepped. The Revenant Crew was sort of painful to assemble since I had to pin all the little bits together, plus a couple of sword hilts broke and had to be glued together. Still though, very cool models. They represent my eventual slide into starting a Cryx army I suspect.
I've been spending alot more of my time lately getting models prepped. The Revenant Crew was sort of painful to assemble since I had to pin all the little bits together, plus a couple of sword hilts broke and had to be glued together. Still though, very cool models. They represent my eventual slide into starting a Cryx army I suspect.
Saturday, March 08, 2008
Holt
Here he is, Holt. He was an odd and somewhat frustrating project. I decided to go with the black coat, but for some reason, that much black just left me feeling like it lacks something. No matter what I had done it would have been alot of one color anyway which probably would have felt the same probably. I wasn't going to use the Cygnar colors in this case. Anyway, it turned out ok, and it was a good experience with painting black again.


11 Weeks To Go!
11 more weeks until Kublacon! I'm counting down mainly because I need to get my act together and have a plan for something to enter in the painting competition. There's basically 6 total categories, made of combinations of fantasy vs sci-fi, and small, large and squad. I've no intention of entering everything of course. I'll be happy to have one or two entries that I really feel happy with. I'll probably keep the whole thing under wraps until after Kubla, but I'll save notes and posts and pics as I go and post them later. In the mean time, I need to start thinking carefully about being ready in 11 weeks. At my current painting pace, this shouldn't be a problem, but I do want to put some extra effort into whatever I'm going to enter.
I've just about got Holt done (just waiting for the basework to dry), and then I can move on to Aiyana. This whole 1-model-per-week thing is making me feel pretty good.
I've just about got Holt done (just waiting for the basework to dry), and then I can move on to Aiyana. This whole 1-model-per-week thing is making me feel pretty good.
Monday, March 03, 2008
Captain Bartolo Montador, aka Broadsides Bart
Just sealed him this morning. I spent noticably more time on him than all those previous Sea Dogs. I found it ironic that I ended up with a relatively "Menoth" scheme to him. I think it works pretty well though. Somewhat flashy, but not over the top. Places where I spent extra effort:
Whites - I really tried to put extra effort into getting the whites to look good. The new lamp definately helped alot here.
Metals - I applied some of those metalic techniques I talked about in a previous post from Quentin and Sabastian. Mostly I was trying to shade and highlight the metals better. I think partially it worked and partially it didn't, but at least it's not just a flat coat of metal with metal wash thrown on top. Totally worth the effort. I'll never go to NMM.
Face - Admittedly, it could be better, but I tried to put more time on this. I'm still not steady or skilled enough to be painting irises in the eyes and all that, but it's slowly getting better.
Basing - This wasn't extra effort on purpose. The chest where Bart rests his foot is sliced to look like it's partially buried. I wanted to keep my pirate basing theme, so I had to substitute something else to be "burying" the chest, so I figured a small pile of coins would do. The coins were made primarily using a tutorial from the Reaper site.

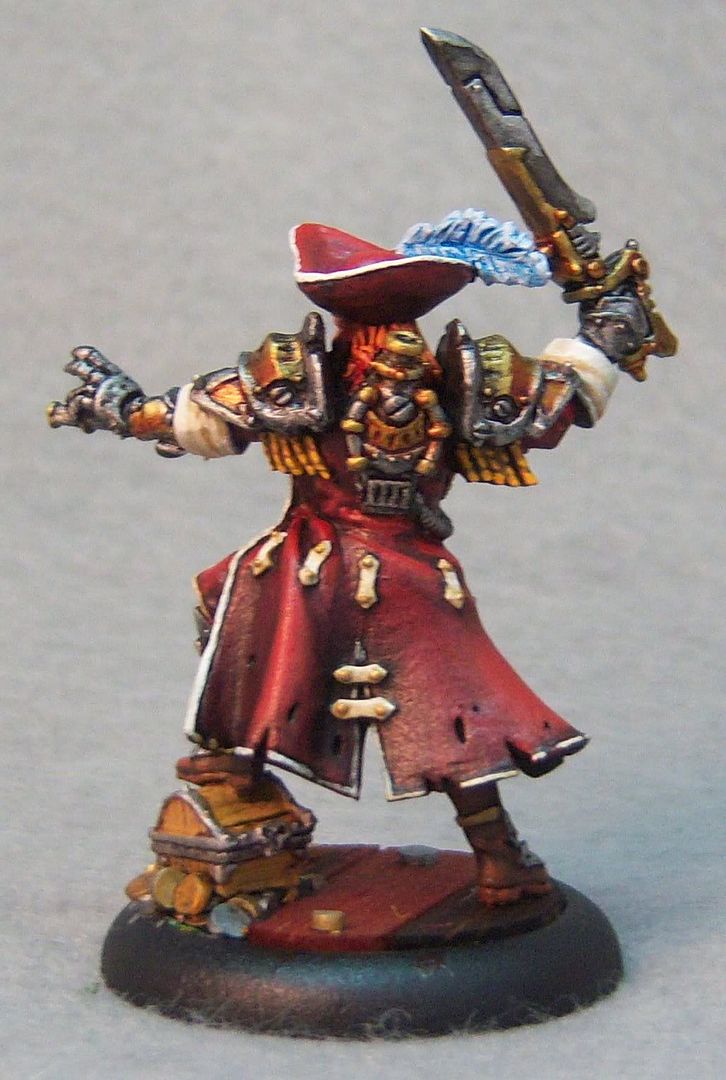
I actually fielded him last night as well in a 500pt battle against Cryx. The battle was quite amusing, and without going into great detail, my favorite part was an armless Nomad headbutting the DeathJack to the ground and then the Freebooter walking up, trashing the DeathJack, and then chain attack two-handed throwing it back into the Cryx backfield. So pleasing. In the end though I didn't have enough heavy hitting firepower to penetrate Terminus' armor (he was camping focus) and then miscalculated with Alexia and Bart and got whacked. I think Bart would be more fun with a Mariner in tow given his spell options. Still though, a very fun battle.
I actually fielded him last night as well in a 500pt battle against Cryx. The battle was quite amusing, and without going into great detail, my favorite part was an armless Nomad headbutting the DeathJack to the ground and then the Freebooter walking up, trashing the DeathJack, and then chain attack two-handed throwing it back into the Cryx backfield. So pleasing. In the end though I didn't have enough heavy hitting firepower to penetrate Terminus' armor (he was camping focus) and then miscalculated with Alexia and Bart and got whacked. I think Bart would be more fun with a Mariner in tow given his spell options. Still though, a very fun battle.
Sunday, March 02, 2008
Painting Techniques Round Up
I follow a particular thread on the Privateer Forums called "Ask the Studio". Recently there were a couple posts that got my attention about "blending" techniques. I'm going to shamelessly quote some of the pieces from those posts here so as to comment on them myself.
The last part I wanted to reference was a post by Quentin about shading metals. The post is long and detailed, but the quick sum up is that he first uses a base coat of a medium metal color, then uses several shading passes of very thin black paint. The purpose is to use a matte color and wash it in the recesses to remove any shinyness. I used this technique extensively on the Freebooter and was quite pleased. In his post he also references this article by Sabastian Archer on CMON. Sabastian is a top notch painter and this article is pure genius to me.
Well, that's it for now. Time to go put the brush to the model and continue painting like I have a pair!
"Drybrushing - Yes thats right, drybrushing is infact a blending technique. The biggest advantage of drybrushing is that it is relatively fast and easy to learn and for this reason it is almost always the first technique that miniature painters learn. Smoother transitions can be achieved by applying numerous very light and subtle coats and adding alittle more of your highlight color to your paint mixture with each coat. Expertly drybrushed models can have upwards of 20-30 very light drybrushes although most have far fewer."This is a technique that I needed demonstrated for me before I really understood. Once I got it, I used this alot, and I mean alot. I still use drybrushing occasionally, but it's for very specific situations. Typically I like the effect of drybrushing when simulating stone, or working on hair and fur.
-Matt DiPietro
"Layering - The definition of layering is a bit fuzzy but when layering is used in the context of blending it means to use very thin paint applied in numerous layers to build up your highlights or shading. Thin paint is very translucent and the layer underneath is tinted rather than covered. With multiple layers the paint is gradually built up. The translucency of the thin paint is the property that causes the layers to blend together. The more numerous the layers used the smoother the blend but the more numerous you layers are the thinner your paint needs to be. When layering, P3 mixing medium or othe matte mediums can be really useful because paint that is thined down a lot with water will run unless applied in very light coats. By mixing in P3 mixing medium as well as some water you can make your paint more translucent while preventing it from running. There are many styles of layering and most painters use thicker paint and fewer layers just to save time/sanity and although the transition between layers is more noticeable the effect is still quite striking especially on the table top."This is, by and large, what I use most of the time now, with a minor variation. I typically will get my color (highlight or shade) on the model, and then "feather" or blend it out a bit using that brush. This is mostly a brute-force kind of blending that I do, which although I have practiced it alot, is currently my main hinderance to better blending.
-Matt DiPietro
"Feathering - Feathering is using layers of thin paralelle lines to build up your highlights. Layers of lines are painted one within another to gradually build up highlights. Check out the head of the Legion Raek for an example of Feathered blending. Its a technique you don't see very often but it yields a very unique textured look while still blending your layers together. It is worth noting that there a some other techniques that are also called feathering so check out post #267 in this thread for a desciption of these."I've heard this term used in a number of ways. Some definitions are closer to what I described my current technique as just above. All things considered, I'm probably doing some combination of "Layering" and "Feathering".
-Matt DiPietro
"Two-brush blending - As the name states you need two brushes to use this technique. One brush applies paint to the the model and the second is used to alter the translucency of the paint while it is still wet. Paint is quickly and messily applied in a line, dot, or glob with the first brush and then pushed or pulled into the desired shape using a second brush dampened with blending medium (blending medium is not the same thing as P3 mixing medium you can find blending medium in many art stores). There exsists a secret blending medium out there which just happens to be the very best but also a little dangerous/gross, yup you guessed it-saliva! If you do decide to brush lick and use saliva as your blending medium be careful that you are using non-toxic paint. P3 is non-toxic, but some other mini paints are. If your bottle doesn't say non-toxic on it chances are at least some paints from that range contain cadmium, cobalt, or other heavy metals that can lead to cancer and other health problems. In any case always avoid getting paint in your mouth. The good news is that slaiva is a natural resister which means that paint doesn't stick to it and you can most times blend away without getting paint on your blending brush. Two-brush blending allows a painter to make big jumps in color and still get the smoothest of blends this means fewer layers which results in a lot of time saved."This is what I've been occasionally practicing. The main barrier for me is still just finding the right places to practice it. There's a size limitation of what surfaces this works best on. I suspect that one of the main problems I was having before was my lighting was throwing too much heat and drying my paint before I could blend it properly. Now that I have my new uberlamp, I need to give this more practice. The application I've had of this technique so far has been pretty good, but I need to get a little more practice under my belt still before I feel comfortable with it.
-Matt DiPietro
"Wet Blending - One of the toughest techniques to do, wet blending is the mixing of two wet colors directly on the mini. It is easiest to do on large open areas. a blob/line of one color is placed on the model and then the brush is cleaned off and the second color is applied next to the first leaving some room in between then using a second brush is used to pull strands of each color into the space between them and mix them together until the transition is flawless. The end effect is like having a basecoat that changes gradually from one color to another."Uhmm, yeah, I simply don't do this. I don't even try. There's a number of reason, not the least of which is I'm just not fast enough with my hands to do this effectively. Plus, until I master the 2-brush technique, I don't even want to fidget with this.
-Matt DiPietro
The last part I wanted to reference was a post by Quentin about shading metals. The post is long and detailed, but the quick sum up is that he first uses a base coat of a medium metal color, then uses several shading passes of very thin black paint. The purpose is to use a matte color and wash it in the recesses to remove any shinyness. I used this technique extensively on the Freebooter and was quite pleased. In his post he also references this article by Sabastian Archer on CMON. Sabastian is a top notch painter and this article is pure genius to me.
Well, that's it for now. Time to go put the brush to the model and continue painting like I have a pair!
Subscribe to:
Posts (Atom)