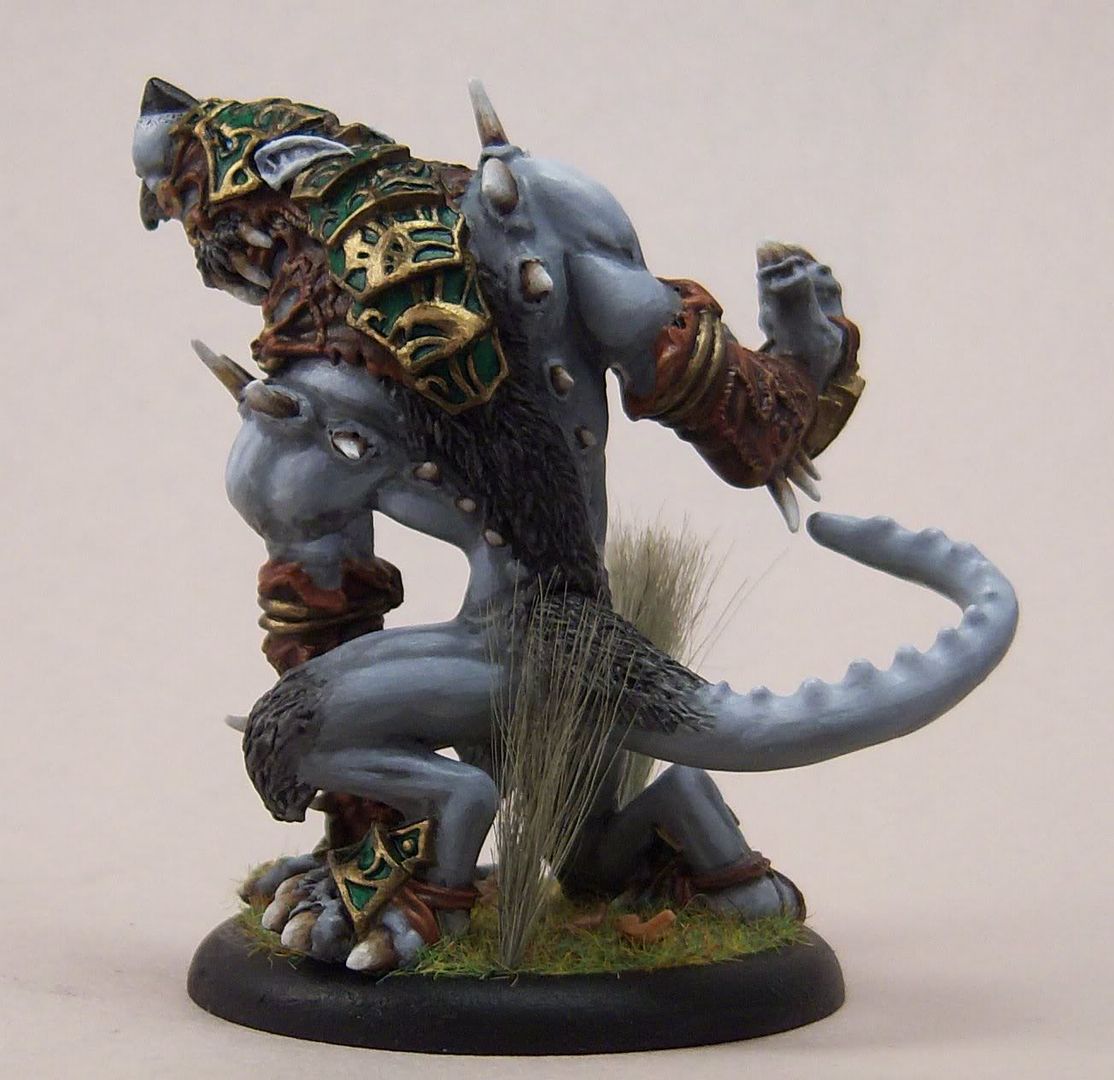
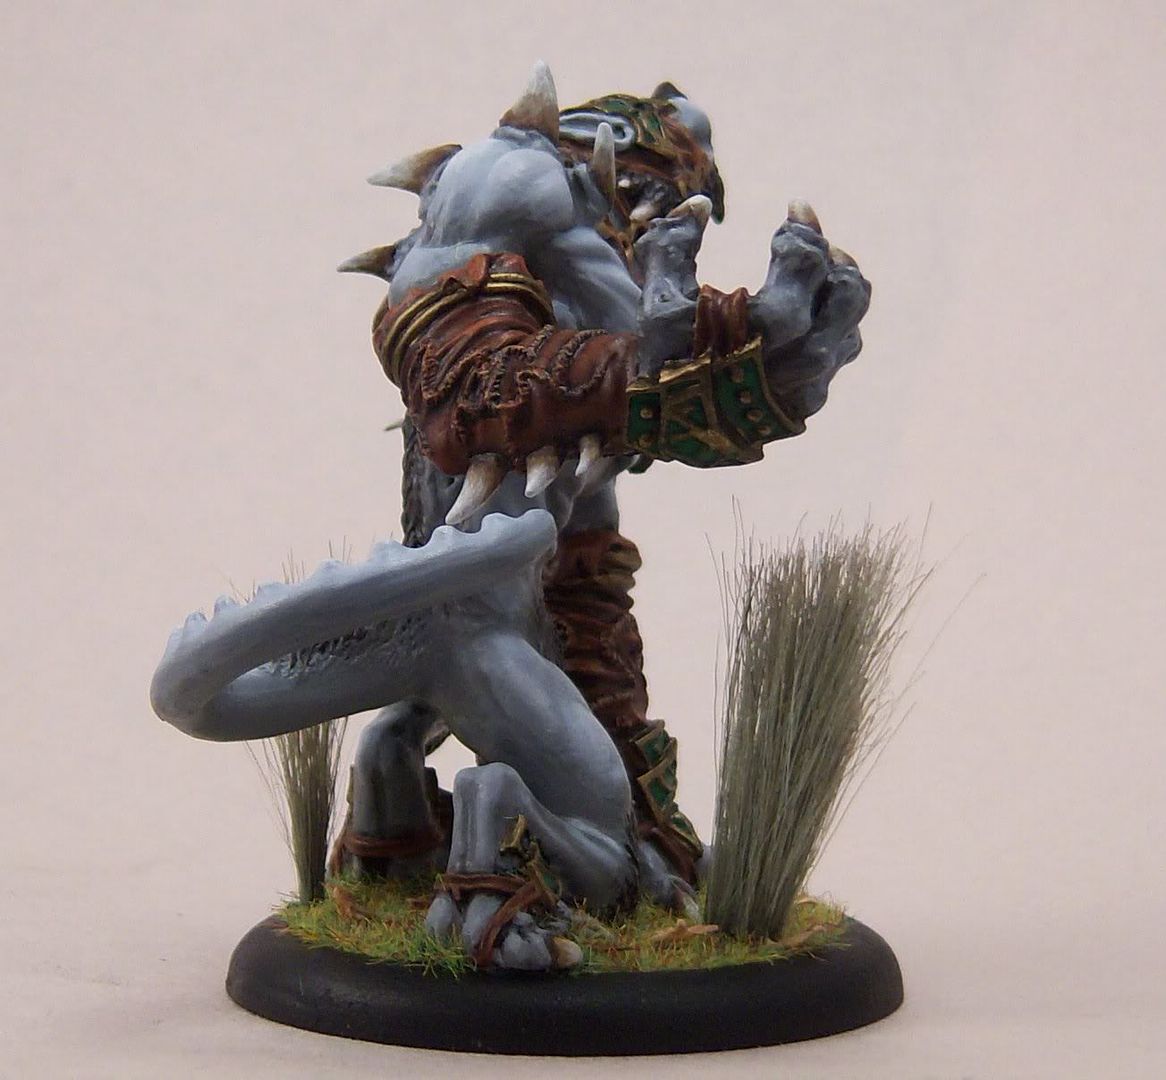
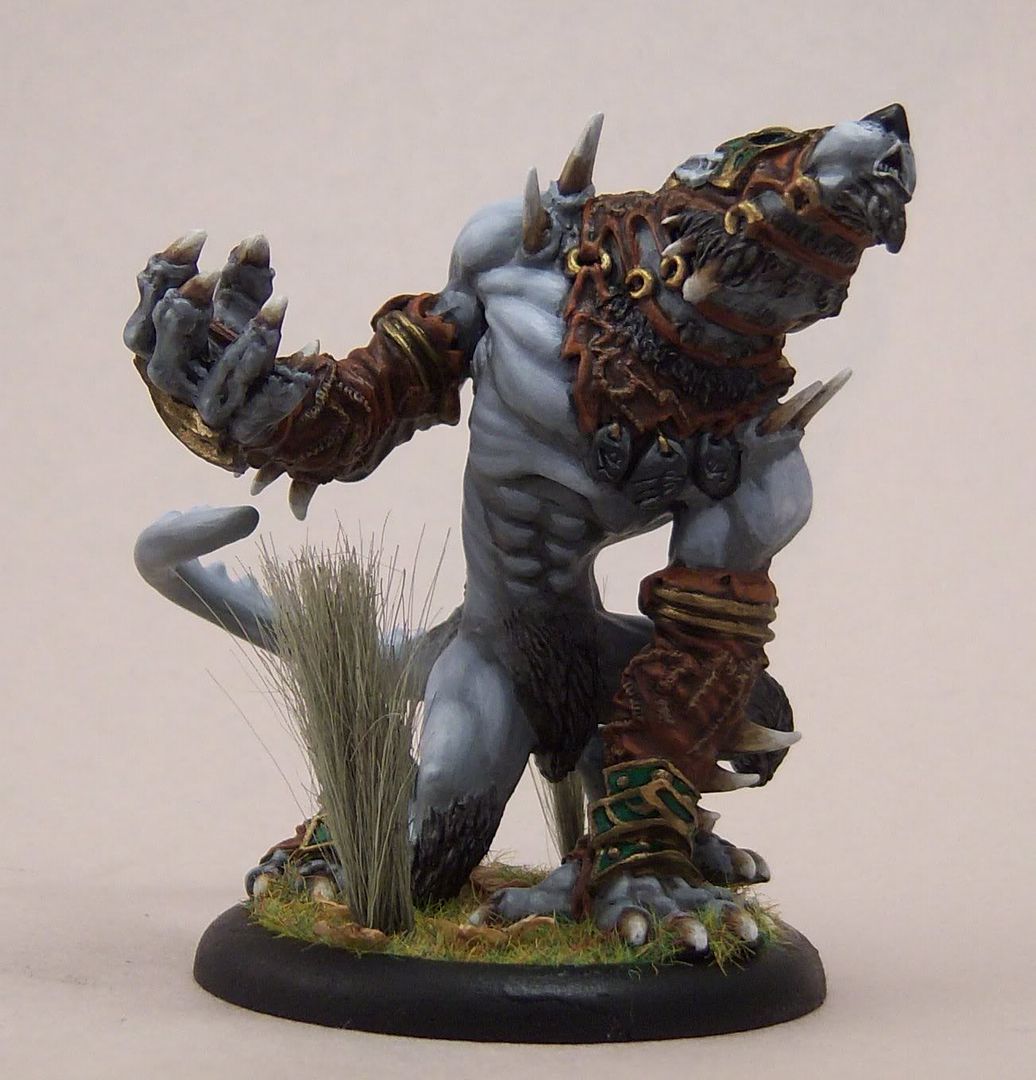
Well, it's finally done. Overall I think it's pretty decent. The skin could have used some reworking in additional spots, but there's a point at which I have to just decide it's done. Perhaps one day I'll just stick out a model until I'm completely happy with it, but that will be sometime well in the future. I've got other little guys calling out for some paint. Some final notes about this paint job:
The little rune stones were actually quite easy. I just gave them a coat of Ironhull Grey, then a wash of black ink, then some highlights of white with just a touch of Ironhull Grey in it. I specifically didn't use Frostbite to make sure they didn't blend in perfectly with the skin.
The eyes were sort of a pain, and in general I hate painting eyes. For these I just used Cygnar Blue Highlight as a base, then added white to it in successive highlights (about 3) until I did a final dot of just pure white.
The base was easy. Just added a bunch of static grass, and then some of the tall grass in a bunch. I'm still not really good with the tall grass, but this batch seems ok. I also added some of the tiny leaves to help give a little more variation to the base.
In summary, this was a great model to paint. Some particular challenges and learning experiences was working the large skin surfaces, particularly in a shading of white I don't normally use.
This is my personal diary of painting experiments and Warmachine, Hordes and other miniature adventures (and perhaps a splash of real life thrown in occasionally too). This blog is as much for my own motivation as to share my experiences with others. My self imposed rule for my army is that I only field painted models. If you're a fellow painter, I encourage you to challenge yourself, learn new skills, try new things, and most of all, paint like you have a pair!
Showing posts with label alpha warpwolf. Show all posts
Saturday, August 04, 2007
Tuesday, July 31, 2007
The Wolf Starts To Shape Up
Made some serious progress tonight:
Armour: Did the metal bits, including a few select pieces of highlighting on it. This stuff was really basic. Just Blighted Gold followed with highlights of Brass Balls. I love the look of the Blighted Gold. In addition I did some specific highlighting of the green with straight Iosan Green.
Skin: This was the real work. Rather than starting all over, I decided to just rework some key spots. I basically just re-did the highlighting work I had done before, but on the pieces I felt really needed it. Notably were the chest, thighs, hands, and shoulders. I also highlighted some of the transitions between skin and spines/claws.
Spines/Claws: Did these entirely. Basically they are 5 coats, going in order: Battlefield Brown, Bootstrap Leather, Rucksack Tan, Menoth White Base, Menoth White Highlight. I'm thinking that I'll do one last highlight of straight white, but not tonight. Getting too tired to see straight.
Base: Just gave this a clean-up coat of Cryx Bane Base.
Muzzle: Did a little stippling with black ink to create a bit more natural transition between the nose and skin.
There's still alot of details to do, but now it's just down to details. Eyes, Rune Stones, Fur, Teeth, and a couple other things probably, but the list escapes me at the moment. Headache and all. Anyway, pics ahoy!
Saturday, July 28, 2007
In Need Of Warp Speed
The Warpwolf is in the early stages of taking shape. The leathers are done, and I've started the armor plates. One thing that makes this model easier to cope with is that there aren't a large amount of varied details. There's plenty of detail, but not lots of little tiny fiddly details like the Fell Caller had. Anyway, here's what I did since last update:
Leathers: These are finished up. I gave them a glaze of the Rust Brown ink, and then a thin wash of dark brown ink to create more depth to the surfaces. Overall I'm fairly happy with the results.
Armor: The inlaid green of the plates is done. These were first given a couple good layers of Iosan Green, and then glazed with green ink, and then a wash of green ink with a dash of black as well t really deepen the recesses. They don't look too snappy at this point, but once the gold trim is done, they should really pop nicely.
Claws/spines: This have just gotten a first coat of battlefield brown. There's plenty of work to do on these. The goal at this stage was just to get the base brown on them so that I start thinking about them now.
I traded a couple emails with Sean about the skin tones. At this point, the plan is go rework them. I just need to mull it over a bit more before I make the next attempt. Most likely I'll continue to work on other aspects of the model first and then come back to the skin later. I'm sure I'll regret that, but I really want to see the model take shape before I commit to reworking the skin.
Thursday, July 26, 2007
The Stupid "Middle Phase"
Made some more progress on the Warpwolf yesterday, but got lazy about posting. 2 update pics. Basically it's slowly coming together, but the skin is giving me some real grief. I'm having alot of trouble getting a blend that I like. I think part of my issue is I'm trying to create more shading than there is legitimate surface to shade. In other words, it's overly dramatic shading for the surfaces. Here's a pic of the progress before I decided to start working on the leathers to help bring the model together more.
I'm really frustrated with this skin. I've give some details of what I'm doing, but 1) the blending is kinda sucking right now, and 2) I've been doing so much experimentation that I've forgotten what I mixed. Mostly its mixing Ironhull Grey and Frostbite together at different ratios. I'm half tempted to go back to a pure Frostbite base coat, and the highlight up to Morrow White, and do some very slight washing with Frostbite and a touch of Bloodstone. I'm not convinced this will look any better though, so it's a question of whether to cut my losses here, or keep laying more paint. I'll see what Sean thinks so far.
Models often seem to get depressing for me at this stage. It's before all the base coats are done, and there's still primer showing. The model always looks terrible at this stage. It will get better... I hope.
The leathers are going much better. The pic below shows the first 3 steps. Start with Bootstrap Leather as a base coat. Next, do a wash of Battlefield Brown. Next, highlight with Rucksack Tan.

My next steps are to do a very thin wash of Black paint, and then a thin glaze of GW Rust Brown ink. The GW ink is one of the non-P3 pigments I use. I just love this stuff on leathers. It gives the leathers a slightly wet look to them, which I prefer.
Monday, July 23, 2007
The Alpha Project
Tonight I started painting the Alpha Warpwolf for a friend of mine (Sean). This is a majestic model. It makes me sad that I don't like the Alpha Troll as much. Anyway, this beasty is going to take a while, especially given my busy schedule, which I shall discuss later. So, I figured I'd use this as an opportunity to do another series of posts of the progress, but this time show alot more incremental updates. I'm not going to haul out the lightbox for every photo, so the picture quality will probably not be so hot. Plus, this photo will be one of the only ones where he isn't glued to a spray can for easy handling, so even if I wanted to use the lightbox, it would be difficult at best.
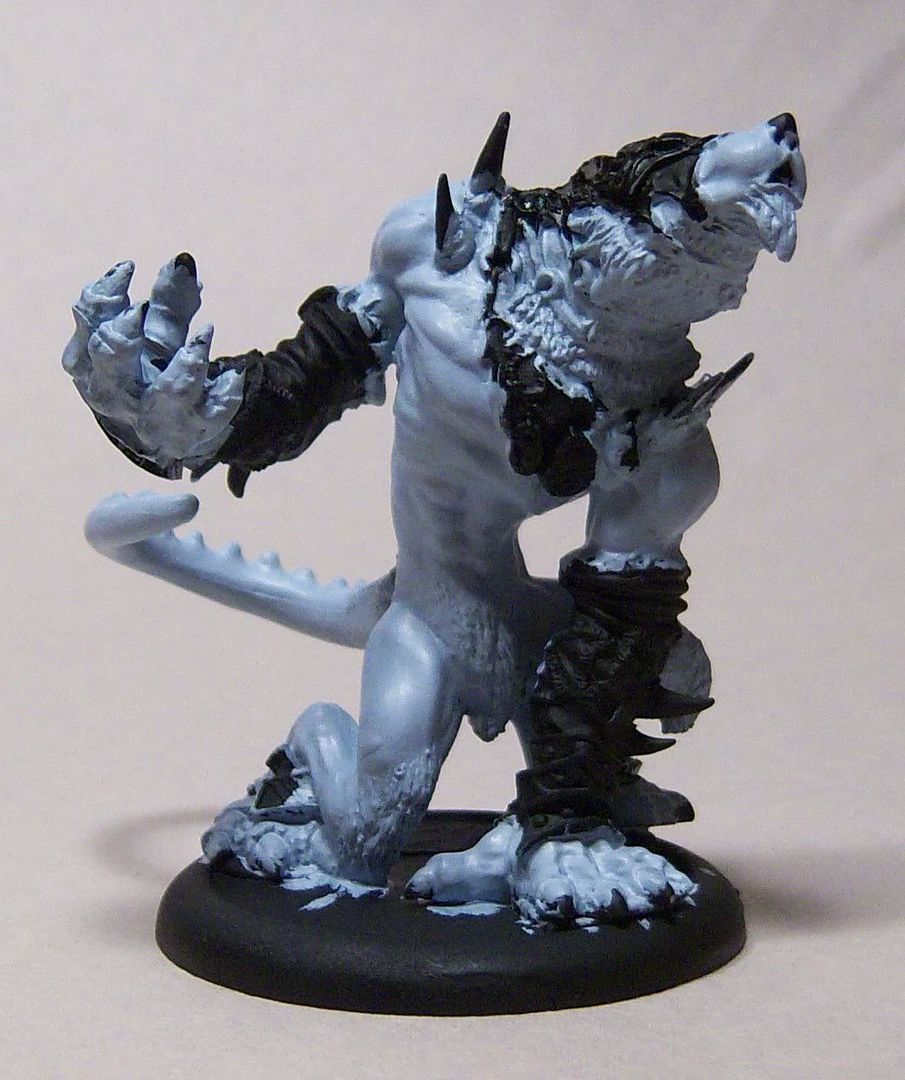
This first update isn't going to look like alot of progress. Basically, I received the Alpha fully assembled, attached to his base, and primed black. And when I say attached to his base, I mean this bad boy is going nowhere. Kudos to Sean for a kick-ass job getting him attached. He's not moving at all.
I've been mulling over what to do color-wise with this model. Sean already has some of the studio green/gold armor bits on his other Circle models, so that choice was made easy. However the fur was another issue. I decided after debating options for a couple weeks, and looking at other warpwolves on the Privateer forums and on CMON, that the studio scheme will be my base for the color. I've got a fair amount of experience with painting white, and it really does make this model stand out. We'll see how I feel about that once I start trying to shade him.
With a basic color scheme chosen, this first step was to base coat all the white skin. I'm starting with this for three reasons. First, there's alot of it, and I've found that painting all the skin on trolls first serves me well for feeling like I've made progress early on. Second, it's easier to just be sloppy when doing all the skin and then be precise later on when doing smaller bits. Third, it gives me the opportunity to review the whole surface of the model. There were a few places where the primer was rather thin, so I made sure to get some paint on there to cover up any bare metal. The irony of going with black primer (and I really love black primer) is that whenever I paint a predominantly white model like this, I always feel like there's some wasted effort going on. Tonight I tacked this single task of getting a couple of nice even coats of P3 Frostbite on all the skin and the fur transitions. This first step always takes me longer than I expect.
The next step will be to begin shading the skin, but not tonight. One thing I still need to decide on is what to do with the base. I want to really spice it up a bit, but there's limited real estate to work with.
This first update isn't going to look like alot of progress. Basically, I received the Alpha fully assembled, attached to his base, and primed black. And when I say attached to his base, I mean this bad boy is going nowhere. Kudos to Sean for a kick-ass job getting him attached. He's not moving at all.
I've been mulling over what to do color-wise with this model. Sean already has some of the studio green/gold armor bits on his other Circle models, so that choice was made easy. However the fur was another issue. I decided after debating options for a couple weeks, and looking at other warpwolves on the Privateer forums and on CMON, that the studio scheme will be my base for the color. I've got a fair amount of experience with painting white, and it really does make this model stand out. We'll see how I feel about that once I start trying to shade him.
With a basic color scheme chosen, this first step was to base coat all the white skin. I'm starting with this for three reasons. First, there's alot of it, and I've found that painting all the skin on trolls first serves me well for feeling like I've made progress early on. Second, it's easier to just be sloppy when doing all the skin and then be precise later on when doing smaller bits. Third, it gives me the opportunity to review the whole surface of the model. There were a few places where the primer was rather thin, so I made sure to get some paint on there to cover up any bare metal. The irony of going with black primer (and I really love black primer) is that whenever I paint a predominantly white model like this, I always feel like there's some wasted effort going on. Tonight I tacked this single task of getting a couple of nice even coats of P3 Frostbite on all the skin and the fur transitions. This first step always takes me longer than I expect.
Subscribe to:
Posts (Atom)