Monday, February 28, 2011

Tournament Report and Something More

So yesterday I was at a 25pt tier fight tournament at my LGS. The super quick summary is that I ended with 3 wins and 1 loss. And that 1 loss was because my opponent made his tough roll on Borka and my remaining attacks missed. The unfortunate part was that 1 loss was in the first round, so my 3-and-1 record didn't actually net me a 2nd place either. Anyway, there were 16 people there. The faction spread was quite interesting: 3 Legion, 2 Menoth, 1 Circle, 3 Trolls, 2 Mercs, 2 Cygnar and 3 Khador. The whole tournament was a pile of fun and everyone had a great time.

Ok, with that summary of the tournament out of the way, I'm going to do something different for the rest of the summary. I attempted to take pictures of several of the painted models at the tournament to showcase how there are some very dedicated painter/players at the LGS.

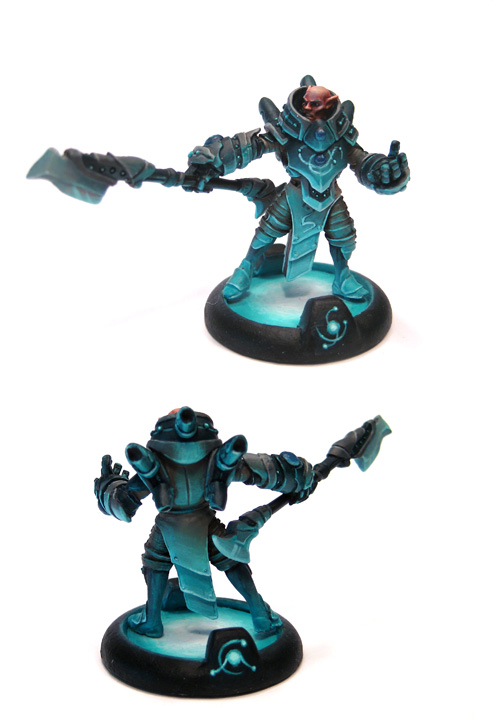
These trolls were painted by my buddy Mike. His new painting blog is here. I really like what he's done with the obsidian theme to his troll army.
It's a shame this picture didn't come out better. This chap's Gun Mages were really nice. The color scheme is really striking and the work on the browns in particular was quite nice.
These Troll wealps were painted by my buddy Lance, who also has a new painting blog here. He's started a new Troll army and painting them using a "magma" theme. He refers to these wealps as "briquettes".
These were Alan's new Rhulic force that he's been working on. I managed to snap this group shot because it was, unfortunately for him, his destroyed pile.
Another model by Lance, this Devastator is a cool example of an aged and damaged jack. For this tournament, Lance was loaning it out to Henry who is still assembling his Khador army.
Unfortunately I have to admit I didn't catch this fellow's name, but he had been working on his Cygnar jacks and this one really caught my eye.
Mahir's Nemo was definitely striking in color. This particular battle was an amusing "old man" fight between pNemo and pDoomshaper.
This shot was less about the models, and more about the situation. It was Khador on Khador and I was stunned at the scrum taking place. And yes, there was a wrecked Spriggan in the pile too. Go Karchev!
And finally this Woldwarden, who was about to deliver a might thump to eSeverius' noggin!
Ok, well that about wraps it up for me tonight. It was awesome to see so much dedication to painting at the tournament. But now, time to get some sleep. Hopefully tomorrow I'll be able to seal up Anyssa and post pictures.

Saturday, February 26, 2011

Saeryn, Omen of Everblight

This model was actually completed a couple weeks ago, but due to extended visitors I wasn't able to reassemble my photo area. So finally I'm getting back into the painting swing and getting caught up on projects that were partially started. Tomorrow there's a 25pt tier tournament at the LGS, so I'm in a bit of a scramble to have things ready for that as well. I've been working on Anyssa the last couple days and just finally got her in enough of a state that I can use her on the table. I'll have pics of her in a couple more days when I finish painting her. For now though, I want to ramble on about Saeryn and where my head has been in regards to painting lately.

Overall Saeryn was a pretty enjoyable model to paint. After my feeling of moderate success with Vayl, I wanted to spend some extra time on this warlock as well.

What worked well:
* Black armor - I spent a lot of time on the black armor pieces, and despite them being a bit washed out in the photos, the highlighting worked out pretty much to my liking.
* Green cloth - Using the colors from Vayl as a template, I again spent a lot of time focused on the green cloth parts of the model. My real goal is practicing my color theory, so it does look a little "overdone" in contrast to the rest of the model.
* Leather straps - I'm not sure what I did on these, but overall I like how most of them turned out.
* Base - For some reason, the basing material turned out great, looking like broken layers of slate. No skill. Just random luck on this one.

What could have been better:
* Skin - The shading on the skin was hit and miss though. The outstretched arm was a little odd to work through and I'm still not comfortable with the end result.
* Metals - As usual, I'm not completely happy with the metals. It's not that I'm unhappy with them, I just feel like they could have been so much better. I suspect it's because I don't shade them down enough and the highlights are just too bright of metallic.

Time for some rambling thoughts... So lately, in addition to being busy, I've been in a bit of a painting funk. I'm working on Anyssa right now and it's hard to focus on maximum quality. I'll elaborate more about that particular model when I post the final pictures. In general though, it's been hard lately to sit down and paint for more than an hour or so, which really undermines my focus on quality. Honestly I need to re-frame how I go about painting probably, especially in light of my goal to paint the War Hog for KublaCon this year. It's a big multifaceted model that will require a lot of hours of work. If I'm ever going to pull it off, I need to be able to summon a high focus on quality on a routine basis.

Ok, enough rambling. Time to sleep and dream of winning tomorrow's tournament!

Tuesday, February 08, 2011

From the Desk: Musing About Mood

Continuing my trend of contemplative posts (due to a busy home life), I've been thinking about how to create an overall mood for a model. It's easy to say that I want to do this, but the actual execution is something I tend to fail at routinely. As I start to work out a scheme for my War Hog, I'm examining my own process of how I go about painting. I typically fall into a trap of having an army scheme and just painting to that with some slight variations. This pretty much excludes any concerted attempt at a holistic painting approach. But let's back up a bit and look at some examples of creating mood.

Yesterday a friend of mine forwarded me this link to a post on the PP forums. The paint job on this Adeptis Rahn is quite impressive. However it's not just the blending quality, basing, OSL execution, or color choices that do it. The overall mood is what makes it impressive. The whole piece gives an overall feeling of arcane power and darkness. The paint scheme really ties the whole thing together and draws the eyes to key places. It's easy to look at it as a completed work and see the whole composition, but staring at a primed piece of metal can make it hard to invoke the "mind's eye" and see that end state before it happens.

Of course, there are numerous other examples of this, not the least of which are Ramos and Tiriel by EricJ. Both of these are examples of dark mood, but there are plenty of others as well. I've found CMON to be a valuable resource for this by looking at some of the top rated models and artists and getting a better feeling for whether a model seems to exude a singular feeling or not.

So what do I take away from this in terms of my War Hog? Well, that's a tough question. As a model, the War Hog itself is a frankenstein of components and surfaces. Marrying them together into a single vision is going to be a challenge, and something I need to put decidedly more thought into. My first impulse is to create a mood of rage. Pure... animalistic... RAGE.

Sunday, February 06, 2011

From the Desk: Random Inspiration

Like most people, my life is a roller coaster. Sometimes I get a lot of time to paint, like 2 weeks ago. Other times I get almost none. I have house guests for the next month and this is cutting into my hobby time (rightfully so). My photo area has to be taken down whenever we have guests too, so anything I do manage to complete won't get posted until the end of the month.

On the flip side, I have come across various sources of inspiration, and one in particular I wanted to share was this thread from the BrushThralls forums. It's a showcase of a number of top-quality painted models from a variety of artists. I'll warn you though, this thread can potentially break your will to paint if not taken in context. I recommend keeping two things in mind while viewing it (and any other painting blogs for that matter):
1) The artists painting these models are doing them for painting competitions and pour many hours into them.
2) Instead of focusing on how well they are painted, look for ideas on color schemes, bases or even just little features that jump out (yeah Butcher, I'm looking at that base of yours).

Sunday, January 30, 2011

From the Desk: The Forest for the Trees

Another weekend comes to a close, but I got some good work done. Among the various projects I hit was finishing up these little trees. I got the inspiration when I found some moss balls in Michael's. I'm a big fan of using felt templates for terrain elements because they provide clear delineations of where that terrain element begins and ends. However they don't provide very much ambiance. So I wanted to create some simple trees that could be put on the templates to spice them up a bit. Here you can see the final product in action, currently being occupied by a few Striders. What follows is a quick description of how I constructed these trees.

First I made these trunks. I sort of did several steps at once, so let me summaries. I cut out small circles of matte board, put a small nail through the center, then used some caulk and stuck it to a small tube. The tubes were just some simple hard plastic pieces of tubing that I cut to length. Sticking out the top is a wood screw which is intended to hold the moss ball. Once all these dried I was able to move on to the next step...

To simulate the bark, I grabbed some bandage tape from the first aid kit and just wrapped it around the tube.

Next I added the moss balls to it. Pictured here are the moss balls that inspired the whole thing. They are roughly 2" in diameter and are light but relatively solid.

After that I glued some garden sand to the base and was all set to paint. The base was relatively straight forward; just base with a dark brown and drybrush a tan on top of that. For the bark, I drybrushed a medium brown onto the bandage. This gave a somewhat decent looking bark effect for the trunk of the tree. After all of the paint dried I put some random flocking onto the base and called it done.

And there it is! A completed tree! Another simple piece of terrain to upscale my battlefields.

Saturday, January 29, 2011

RtC: Slow and Steady... is Boring!

Weekends are great. I don't really get a big block of time to work on stuff, but I get plenty of small slots to get stuff done. Today is a good example of that. In addition to the work in this post, I also got some work done assembling Annyssa Ryvaal, and some work on my upcoming SPQR series. More on that later.

First of all, I wanted to start getting the main body together. One of the challenging pieces to line up is arms that have these sorts of indentation sockets. I read a tip once of using a drop of paint to line up holes, which is what I'm (sort of) doing here. Unfortunately I ended up with a bit too much paint, but it will still serve my purposes. While that dried, I moved on to other parts.

Putting together the torso looked easy enough, but of course I chose to make it more difficult. The tail was the real reason. I wanted to pin the tail but quickly discovered that the bottom half of the torso has quite thin metal in the slot designed for the tail. So I opted to use a technique I've used before where I run a single pin through the middle of the torso to hold everything together. This photo is the before shot, with the pin obviously too long. The process is simple enough though. Drill the holes, put green stuff at the joins, put a bead of glue on the pin, and jam the whole thing together. The glue dries quickly enough to hold everything in place while I then proceed to smooth out all the green stuff. In this case, I went ahead and added on the tail as well.

Next was the head, which I kept simpler. Again, I ran a bead of green stuff around the edge (after scoring the surfaces to improve the join) and smashed it all together. Because part of this join included his mohawk, I added some extra green stuff and did some very basic sculpting to make the join look relatively seamless. The big problem I ran into here was the gaps around the neck. Rather than knead up more green stuff, I decided to let this part harden a bit first before I decide to tackle those spots and smooth things out.

Lasty, I went ahead and assembled the leg and arms. These were straight forward pinning and placement (with the aid of paint drop marks). There's some putty work to do to make those joins look a little nicer, but at this point I'm running out of time and need to get some sleep. I also finished the last of the assembly work for Annyssa Ryvaal at the same time which was a nice bonus.

The next step will be to start building a base, put on the remaining two pieces, and do the putty work to clean up joins. Taking my time to pay attention to all the assembly details is taking additional time, but I definitely feel it will be worth it in the end.

Wednesday, January 26, 2011

RtC: Progress is Progress

Some nights I get a lot done. Others... well, it's a struggle to get anything done. If I know that I'm going to have a tight evening for time, I tend to focus on things where a small amount of time can still net progress that feels good. This evening was one such evening. I opted to get some assembly work done on the War Hog. I had about an hour so I reviewed the pieces to assemble and strategized on where to start. This model will require a fair amount of putty work, I determined which pieces were key to get done first so that putty could dry before moving on to other parts. The big key part here was the lower body. I scored these two parts and put them together with putty. I needed to do a slight bit of cleanup for the rope that runs around the waist due to a break where the join was. Easy enough though.

Next I worked on putting the smokestacks and aggression dial on to the upper body. While not strictly a key part to get done, these were easy to put together with just a bit of putty work.

Lastly I assembled the left arm, putting the hand onto the forearm. Although the join surfaces are pretty substantial, I opted to pin these together. I tend to be a little extra crazy about pinning even though it takes some extra time. I've rarely felt like pinning was wasted effort however, and with my dremel in hand, the work is pretty quick.

Well that's all for tonight. As I mentioned, progress is progress. This model has a target date of May so I feel a slow-and-steady attitude will serve me well.

Tuesday, January 25, 2011

From the Desk: "Go To" Colors

Everyone has them. There's those 4 or 5 paints that see more activity than anything else. They are your "go to" colors. The ones you fall back to for whatever reason. In the myriad of discussions I have with folks about painting, this topic came up the other day and it was suggested I post about it, so here it goes.

Theory:
Whether it's personal affinity for a color, or familiarity with how a specific paint performs, painters will find their own specific paints that they like. These colors may change over time, but a painter will tend to favor specific colors for stretches at a time. Let's look at a couple reasons and examples.

Utility - Some paints just present a lot of utility to them. They have flexibility to them that enables multiple tasks to be done, or simplifies specific tasks. The GW wash Badab Black is an excellent example of utility. It's really useful for black-lining around surfaces, or shading metals. P3 Menoth White Highlight on the other hand is really handy for lightening up a color for highlighting purposes. Paints chosen for utility tend to cause specific effects, whether that be through they way they flow or the color tone they introduce, as with the two above examples.

Performance - Some paints just perform better, specifically in coverage and consistency. GW metalics for example perform very well over pretty much every other brand of metals in this area. P3 Khador Red Base is another good example for it's good coverage despite being a red tone, which typically has challenges with coverage. Paints chosen for performance tend to stay as favorites until a better performing paint is found to replace it. These paints are also less likely to have a specific impact to the painting style directly.

Affinity - This has to do with what colors someone likes, and it obviously much more varied than the above reasons. Different people just like different colors. There's certainly some psychology to play into that, but I'll skip such discussion here. Needless to say, paints chosen for affinity do not themselves directly affect the painting style, but allow the painter to express their own artistic style.

Whatever the reasons, it's good to know when you favor particular colors and why you favor them. It's a good exercise from time to time to set aside a go-to paint and try out something new. Doing so can be frustrating, but will ultimately make one a better painter.

Practice:
Ok, now that the theory is aside, let's talk about my own go-to colors to give you some concrete perspective. I've included some pictures of my own models for reference.

P3 Sanguine Base
Sanguine Base has become a favorite color for me for a couple reasons. Firstly, the rich red color gives a feeling of warmth, but provides more than just a typical red color. Second, I like how well it covers and blends. It's a tone that works well for shading both blues and greens. Here on this Raek is an example of using the Sanguine Base to shade the light blue flesh given a sense of warm flesh on the undersides.

P3 Coal Black
Coal Black has long been a favorite for me. I once read a tip from of not using black to shade with because it appears less natural. I experimented with using Coal Black instead and fell in love with the results. It provides a deep cool blue tone to shadows which has become a staple effect for me. I've found that VMC Dark Sea Blue is also a good substitute for P3 Coal Black. The two aren't exactly the same, but close enough that the dropper bottle format from VMC provides an added level of convenience well worth the tonal shift. Here on Kraye's horse, I used Coal Black to shade to create a cooler contrast with the base.

P3 Bloodstone & RPP Blood Black
Ok, I'm cheating a bit on this one by lumping two together. Both of these are rich brown colors. Bloodstone in particular is a complex color. Blood Black has a rough equivalent to P3 Umbral Umber which I had used previously before I found the RPP color. Although they are ideal colors for working leathers (as exampled on this Death Marshall), I find that they are useful in a number of areas, including both subtle and deep shadings of greens.

P3 Cryx Bane Base
Cryx Bane Base is more of a utility color than an affinity for me. I use this color for everything from gray cloths to rocks to flat steel plates. It has a rich greenish gray color to it which I've found that works well with a number of schemes. Here on this Vassal I used it in the deeper shading of the robes to provide a little harmony with the yellow and red colors. I have to say that I'm really fond of how well this particular paint blends, particularly using the 2BB method.


Using them together...
It's not uncommon for me to use more than one of those colors on a single area. On this Ravagore's chitin for example, I used Coal Black, Sanguine Base, and Blood Red in washes and 2BB to bring out the surface characteristics of it more. The colors are not applied uniformly though so as to create plenty of character to the chitin.

So what does knowing this do for me? Well predominantly my go-to colors are dark shades. I tend to work my way down from lighter colors and shade down more than highlight up from dark colors. Knowing this helps me to plan my colors and process better. I will often start with a base coat that is somewhere around 75% brightness of my overall look and work from there, although sometimes I'll even work from a white primer base and only shade down, working special highlights in as needed. In any case, knowing what your go-to colors are and how this affects your style can help to better develop your use of color.

Monday, January 24, 2011

Raptors

Finishing up a unit is a nice feeling. I can honestly say that it's not very often that I finish a unit and really feel like I hit a home run on quality, and this one is no different. However getting these Raptors finished up was a major accomplishment for me. Five large based models is a fair portion of painting to get done, and I'm really looking forward to playing them more often now.

I'm going to skip the normal summary and just highlight that the photos and the speed painting were the downsides, but some of the speed painting on the black armor pieces was the upside. It's pretty late and I'm sorely in need of sleep.

Sunday, January 23, 2011

RtC [Road to Competition]: And So It Begins...

Once again, KublaCon is on my radar for the main painting competition to enter this year. This year I've decided to paint a War Hog for my entry so I figured I would chronicle the entire effort on this blog. Everything from initial planning through the final event. The series is going to span several months (since KublaCon is Memorial Day Weekend) so I'm going to tag these posts with the RoC label for easy reference.

Why did I choose the War Hog? It's certainly new and cool, but I chose it for other reasons than that. First of all, it has both "organic" and "machine" components to it which will challenge my abilities. This is also a good opportunity to display different techniques on the same model which can help win the judges' attention. Second, it's a good sort of model to draw attention to the PP line of models, which I enjoy trying to do. Third is that it's a larger model, and I wanted to focus on a larger model as my single entry rather than a smaller one. With my selection solidified, it's time to start the ball rolling. The next step is to go ahead and unbox the model and start looking over the parts.

Here are the various pieces for the War Hog, freshly unboxed. There are 14 total which could be a little intimidating. I went ahead and spent tonight prepping the pieces by trimming and washing them. I spent about 45 minutes on this step since making sure to catch as many ragged places to trim during this phase saves plenty of headache later. Since this is a serious competition piece, I decided to take the extra step of washing all the pieces with warm soapy water and scrubbing them with an old toothbrush. This helps get rid of any residue. Overall the pieces were in remarkably good condition and relatively little trimming was necessary. The biggest work was on the edges of the axe blades where a lot of filing was necessary.

My next step will be to begin assembly once all the pieces have dried. Here is pictured the assembly instructions from the back of the box. Due to the large number of pieces, I'll need to do it in sections so I'll need to spend a little time strategizing how I want to do that assembly. That's enough for tonight though, as I have other projects I want to get some work done on at the same time. For example I want to get Saeryn assembled so I can prime her tomorrow, and the Raptors are down to just final touch ups.

Wednesday, January 12, 2011

From the Desk: Being Sick Is Sometimes Good

Being sick sucks. But sometimes there are hidden benefits. The last two days I stayed home from work and managed to get some terrain making and painting in. To the right here is a picture of the simple hills I made, along with a Khador monolith. The monolith is really going to be a gift for a friend. I got the inspiration from this blog post. I'm not great at terrain making, and generally don't have the patience for it. However I wanted to get more terrain together for my own area. Part of my inspiration to do this was the Warmachine Battlefield Generator which creates a random terrain layout. I've become quite fond of this tool, but quickly discovered that I don't have all the terrain pieces needed to properly support following the random layouts it generates. Hence, I'm on a simple terrain making kick. I'm also sick of only having felt templates all the time.

I also got a serious amount of painting time in on my Raptors. Units are always a little soul crushing for me, but 5 large based infantry at once is a bit more so. I'm just going for tabletop standards on these guys since anything higher would probably drive me insane. Overall though, it's going pretty smoothly. Last night (after taking these photos) I finished up painting the armor edges which was a major hurdle. Now I can focus on details. The armor edging is always tedious and exhausting to do, so having that part already done really lifts my spirits.

In the realm of trying to meet my 1-1-1-1 unpainted goal, I did a quick tally of unpainted models and found I have the following counts:
* 4 Caster (2 Legion)
* 1 Jack
* 3 Units (2 Legion)
* 3 Solos (1 Legion)
Now there's some fudging in there. Two of those units are rolling in their UA's rather than counting the UA as a separate model, and one of those solos is actually the 3-pack of Spell Martyrs. But the principle is sound. I'm really quite focused on slimming this down. I've recently been very interested in the Farrow but I'm trying to keep focused on painting down my backlog before I start a small Farrow army.

Thursday, January 06, 2011

Battle Report: Double Impact

Last night I played an alternative battle format that my fellow gamers and I have been working on for a couple weeks now. The format is called "Double Impact". I'll post the detailed rules for the format in a few days once we've cleaned up the language, but the basic concept is sort of a tag-team format, where each army has 2 warcasters, with one warcaster off the table at any given time.

The Armies:
Me: Thagrosh, Vayl, Carnivean, Scythean, Typhon, Shredder, Forsaken, Striders w/ UA
Lance: Mohsar, Kromac, 2 Feral Warpwolves, Woldwyrd, 6 Bloodtrackers, Nuala, 5 Wolf Riders, Lord of the Feast, Feralgeist

The Throwdown:
Vayl and Mohsar were deployed first which really set the tone for the game. The battle quickly turned into an attrition game, pinging at each other and trying to wear things down. Vayl used Chiller on the Striders in order to reduce key targets' DEF to make it easier to lay some attacks out from the heavies. An early strike got a Carnivean spray hit on Mohsar, and Typhon was a rockstar at laying out sprays on Bloodtrackers and Wolf Riders.

The Endgame:
The triggering effect was Typhon getting into position to drop 3 sprays on Mohsar. On the last spray, Mohsar took the damage and croaked, putting Kromac on the board. At that point my turn was done, but Kromac was within the strike range of Vayl. He rolled up, jumped into melee with her, and then proceeded to go to town. However, due to a cruel twist of dice fate combined with Vayl having Tenacity on her to put her at DEF 16, Kromac missed with a lot of attacks. He landed enough to take Vayl out at which point Thagrosh landed on the table. This put an interesting twist since Kromac could then continue to land blows (and easier too since Thagrosh is only DEF 14). However Thagrosh is an effective ARM 18 and was able to absorb the remaining hits pretty easily. At this point it was a quick matter of the Scythean headbutting Kromac to the ground and the Thagrosh went to town like a master sushi chef.

Highlights:
* I still love my heavy beasts. Legion heavy beasts are just a ton of fun to play.
* I definitely need more practice with Vayl. She seems great, but has a number of features that I need to remember, and learn how to sequence her abilities. Honestly though I find her to be pretty interesting.
* Mohsar's feat has an old school Severius-style crushing feel to it. Not being able to reave fury is a huge pain, especially for a beast heavy list.

Reflections on the Format:
The format seems pretty fun. We're continuing to make tweaks to try and get it refined. There were a number of rules questions that came up while trying it, but most of them were easily resolved. I definitely like the tag team idea and this gives enough tweak to the format to introduce something new without throwing everything sideways like Frankenstein or Casterjackapalooza do.

Tuesday, January 04, 2011

Vayl, Disciple of Everblight

First finished model of the year! I told myself that I wanted to get to a point of having a 1-1-1-1 unpainted system for my Legion army, so this gets me closer. This puts me at 2-0-2-1, so not terribly far off from reaching that. Unfortunately this photo is rather grainy, and I'm not sure why. For this model though, I was issued a challenge by a friend to not use my "crutch" paints for some part of it. So I left out the colors I typically use for Legion flesh: Underbelly Blue, Trollblood Base, and Sanguine Base. It created an interesting color challenge for me to reproduce something close to those colors. It turned out to be easier than I thought. I used combinations of flesh tones and strong blues which worked well, and then added deep red tones to do the shading with.

What worked well:
* Despite the graininess of the photos, I feel like the blending of the cloak worked out quite well. I went with a more yellowish tone that previous Legion models and I like this shade better.
* The basing worked out well. Due to her wide robe I needed to put something wider, which meant adding some elevation. This base is simple but effective.

What could have been better:
* The blending on the flesh isn't so great unfortunately.
* The armor is ok, but I feel like it could have been done a little better. I really struggled with how to improve it but just couldn't fine a solution that I liked.
* I'm going to say that the feathers could have been better, however I really am pretty satisfied with how these turned out. I have yet to find a solution for small feather like this that I like. Only the Shepherd seems to have turned out to my complete satisfaction.

Sunday, January 02, 2011

From the Desk: Vayl, Photos, and Prepping for 2011

In order to produce more consistent photos (angle, lighting, distance, etc) I put together this little mounting system. The idea is that it will reliably hold my standard model mounts (empty spray cans) and the old broken tripod of my camera so that I get consistent results. This will be very helpful For putting together step-by-step photos without having to drag the models into my normal photo box (which is not meant for models still attached to paint cans). So how good is this little set up? Let's take a look at my very first attempt at such photos, using my current in-progress model: Vayl.

My before picture isn't really much of a before. I'd nearly finished her at the point I had this set up ready for testing. So the before and after is of her skin. At the time of writing this, I've finished painting her, but need to construct a base for her. The robe is a little annoying in that it flows out well over the edges of a small base. I typically try to create more interesting and raised bases for warlocks, but Vayl is definitely going to require something extra unfortunately. If it wasn't for the basing needs, I'd have her wrapped up tonight most likely. But the need for gray stuff to dry and whatnot will mean she needs to wait until tomorrow.

Here's the after picture. This is the point at which I've determined what additional steps I need to make sure I take when doing these sorts of photos. First, my removing the camera from the mount caused the mount angle to shift a little, which causes some differences in the camera angle. Second, cropping separately causes some inconsistencies between the pictures. Third, I didn't mark the alignment of the model, so it's not facing exactly the same as the first photo. These are relatively easy to fix as a matter of process though by just doing some simple markings as I do the first photo.

Saturday, January 01, 2011

2010 Wrap Up, and 2011 Resolutions

[Disclaimer: This post contains fluffy, introspective nonsense... Just like last year's did.]

Once again, I find myself at the beginning of a new year, and it's time to look back at the previous year.

Last year's goals:
1) Focus on a KublaCon painting entry that I am really proud of - Check! Last year was awesome for KublaCon for me. I'm still pretty psyched about how well I did. More than just that, I got a lot of useful feedback that helped me improve my painting.
2) Close out my unpainted Malifaux backlog - Uhh.... not check. I've still got several left, and I'm not making much progress on them.
3) Refine my own "style" of painting - Uhh... sort of check. I've been trying to do this, but in all honesty I haven't been doing a good job of it. It's hard for me to really elaborate more except to say that I'm more keenly aware of where my weaknesses are in my painting style.

Models painting last year:
This year turned out to be pretty similar to last year. All things considered I find that to be a feat unto itself given that I have a child now, along with a job that has become more demanding. The total comes to 69 models, 3 over last year. This year had a number of beasts as I was really working hard on my Legion army.
Legion: 27
Mercs: 18
Protectorate: 3
Circle: 2
Cygnar: 7
Khador: 1
Minions: 1
Malifaux: 5
Other: 5

Goals for next year:
1) Enter the KublaCon painting competition at the masterclass level. I promised myself if I got a gold in the open level, I'd move up to the masterclass level the next year. Last year's entries were good, but I need to step up my quality even further. Amazingly I am already thinking about what I'm going to enter.
2) Close out my unplayed factions. I'm really only playing Legion now, and I'm thinking about starting a minion "army" just for fun. But I really want to get done with the remaining models for the other 3 factions I don't play actively. It's only 12 models actually, so it shouldn't be that big of a deal.
3) Do a series of posts on "speed painting". This is a project I've started working on already (in terms of research and planning), but I want to make sure it takes shape. Look for this to start happening in the next couple weeks.

Well the evening hours are burning up, and there's models on my desk to paint. It's time to put the keyboard aside, pick up the brush, and paint like I have a pair. Happy new year everyone!

Thursday, December 30, 2010

Tuesday Nights at the LGS

I'm one of the fortunate players who has a fairly thriving WarmaHordes community in the area. Not just that, but within a 2 hour driving radius, there are at least 3 game stores that have table areas and hold tournaments. My favorite and closest LGS not only holds monthly tournaments, it has an active press ganger who organizes Tuesday Warmachine gaming. Normally I have trouble making it to Tuesday Warmachine night, but since this was a vacation week, I was able to swing in for a couple games.

Before I cover a quick battle reprot, I have to give our PG (Ray) a shout out. This guy is great for a number of reason, but here's a couple things I really appreciated this week:
* He was purposefully organizing games, putting himself at the bottom of the wait queue for a game.
* He takes the time to know who all the players are, and suggests match-ups for players so that they get a good gaming experience.
* He strikes just the right balance of being polite and delivering some friendly smack talk.
* He's quite a sharp player and makes a very worthy opponent.

Ok, now for a quick battle report. I got 2 games in, which I'll try to recount with extreme brevity...

Game 1:
Me: Absylonia, Scythean, Carnivean, Raek, Stinger, Shredder, Forsaken
Wing: pVlad, Beast 09, Destroyer, IFP, Manhunter
Outcome: Victory!
Summary: I hadn't played against pVlad in MK2 yet (amazingly) so this was a bit of a learning experience. During his first strike he laid out good damage on both my heavies, but since he didn't kill them, Absylonia feated and it put me in a strong position. My counter-strike cut Beast 09 down to 3 boxes left and slaughtered half the IFP. From there it was a grind match that ended up with pVlad alone against Absylonia, a Stinger and a Shredder. Under Blood of Kings he is a tough customer, but I managed to pull out the win with a Stinger poison charge in the back.

Game 2:
Me: Absylonia, Scythean, Carnivean, Seraph, Stinger, Shredder, Forsaken, Deathstalker, Sorceress
Ray: Grim, Blitzer, Impaler, 5 Scouts, 10 Burrowers, 2 Fell Callers, Chronicler, 6 Nyss Hunters
Outcome: Victory!
Summary: This was a serious knock down drag out fight. I managed to swing around to Grim's flank with most of my army and started pushing towards him while using the Sorceress to put a temporary hold in the middle of the board with her wind ravager ability. I got a the drop on the Blitzer and took it out, but the burrowers with bonuses from the Fell Caller were just overwhelming, taking down heavy beasts pretty quickly. Absylonia and Grim were toe-to-toe for 3 turns in a row before Grim finally went down. In the end Absylonia was only left with her Scythean while the trolls still had at least 15 guys on the board still. However the early slaying of both troll beasts put Grim in a rough position such that he couldn't generate enough fury. This was a tough battle but very fun and a great learning experience.

Wednesday, December 29, 2010

Madelyn Corbeau

Yes, yes, I know. She's all "American" style. The color scheme was half accident, half on-purpose. I wanted to try out the color scheme, and Ms Corbeau seemed like as good a subject as any. I'm not going to belabor this post too much. It's mainly nice to have one more unpainted merc done. Just 2 more to go!

What went well:
* The reds turned out pretty well I feel. Despite all the bad press about red as a color, I seem to have a knack for it. Either that or I've got some sort of color blindness.
* Overall composition of this model is not too shabby. I feel that the concentration of lighter colors (combined with the shape of the sculpt) draws the eye up to her face nicely.

What could have been better:
* The flesh is pretty weak for some reason. I've never had good luck with flesh. I need to just take more time on it I suspect.
* The whites appear somewhat dirty, but not on purpose.

Ok, time to see if I can squeeze out one more model before the new year.


Thursday, December 23, 2010

Ravagores

There are times when I paint a model just for the bliss of that model's sculpt. There are times when I paint a model because I desperately want to field it in my army and I strive to paint everything I field, even if the model is a complete eyesore. And then there are times when a great sculpt and great stats come together. The Ravagores are one such example for me. So much so that I bought 2 of them after proxying them only once. I can't exactly pin down what it is, but the "Carnivean chassis" for Legion beasts has always been fun to paint despite its size. Getting these guys done was more than just fun though. This solidly relieves my feeling of being such a whore for fielding two of them with eLylyth. In tribute to this accomplishment, I'm going to return to my old-style analysis entry...

What went well:
* Painting both at once - I had debated doing them individually. There were merits to both. I actually like having variations between my Legion beasts, but doing them together provides a certain economy of scale that's hard to argue with.
* Alternate chitin - When I first started going with the red chitin on the one Ravagore, I had my doubts. However the end result turned out quite striking I think. It gives each of them a distinct feel, makes them identifiable from each other, but they still seem to fit in theme.
* Slight pose alterations - The "red" Ravagore got a bit of a pose alteration so that he was a bit more straightened out and accentuating the breath attack. I didn't like the original angles of the pose, so making a shift was needed. I think the way these two worked out was nice yet subtle.

What could have been better:
* Flames - I'm not entirely happy with them. Ironically, they look better in the pictures than in person. There was something just not right about them. However I did them last, and by that point I was ready to be done. Putting more time into them was unlikely to yield significantly better results so I just called it completed so I could move on.
* Little mistakes - After sealing them, I found a couple more little places where skin base coat had gotten on the chitin. They aren't obvious, but spotting them ticks me off. I need a better process for the final inspection of models before I seal them.

Well, that's it for tonight. My painting desk is now finally rather clear from several months ago where I was feeling overwhelmed.

Friday, December 17, 2010

Absylonia, Terror of Everblight

My painting pace seems downright terrible these days. All things considered I feel like I'm making good progress considering my circumstances (work/baby), but I'm still having trouble getting things completed. However, I managed to get Absylonia here finished out tonight. My photo setup is still in desperate need of tuning, so the photos are pretty badly off from the real life viewing. However I'm happily trading time away from fixing my photos to just get painting done.

Nothing really special to report about this model. Pretty standard techniques for my Legion stuff. I tried to spend a little extra time on her, but honestly my skills (read as: patience) have slid off a bit and it's nothing really special to talk about in my opinion. I'm in the midst of the 2 Ravagores at the same time so it was hard to stay focused on this model while the two big beasties were staring at me from across the paint table. Speaking of which...

Monday, December 13, 2010

From the Desk: Displaying Models

There's plenty of discussion out there about how to transport models, but displaying them at home is a whole different ballgame. Perhaps I'm slightly insane, but I like to have all my painted models in a display case. Whether it's pride or an obsessive compulsive streak, I actually enjoy unpacking my models from the toolbox and placing them back on glass display shelves. For those of you looking for such options, I'm going to review two such cases that I've had first hand experience with.

First is the Detolf case from Ikea. I really liked this display case a lot. It's remarkably study for being 4 sheets of glass. A while ago I posted about adding shelves to that case as well, which worked great. The upsides of the Detolf:
* It's relatively cheap
* It looks nice
* It doesn't require lights in order to get good views of models (especially with glass on all sides)
The downsides:
* It's glass all around (making it rather unsafe for toddlers)
* It has distinct gaps on either side of the door that let in a fair amount of dust

The second case, which is the one I have now, is the Bjursta (also from Ikea). There are two reasons that I "upgraded" to this display case. The first is that I simply ran out of space in the Detolf. The second reason is that I have a new son, and I needed something a little safer. I actually blocked out the glass on the lower doors with cardboard for the time being. The upsides of the Bjursta:
* It holds way more models, probably 5 times as much shelf space as an unmodified Detolf
* It's easier to make toddler-safe
* It has a convenient drawer in the middle to hold cards, dice, books, tokens, etc
* The shelf heights are adjustable
The downsides:
* It needs lighting added
* It's definitely more expensive, especially when adding in the cost of lighting
* It has a larger floor footprint, approximately twice that of the Detolf
* Reduced viewing angles of models inside

There are plenty of other options out there. When you look for a case, there are a few key things to keep in mind:
* Model height: Determine what your largest model is, then make sure the case has plenty of height for that model.
* Maneuvering space: Again, in regard to shelf heights, make sure you have plenty of space to get your hands in and move models around safely without knocking things over.
* Capacity: Make sure whatever you get has plenty of space for everything you want to display, with room to expand as well.

And now a quick picture. This is the top half of my own Bjursta case. It has all of my Protectorate, Legion, Cryx, and Malifaux models, with room to spare still. I added the led display lights to it with a switch on top of the case to activate them all. So far I've been extremely happy with this case.

Sunday, December 05, 2010

Harriers

I can't believe I sealed these guys a week ago and just wasn't able to get pics posted until now. Work has been a serious nightmarish black hole of my time. However I have finally carved out enough time to get this post done. It's the last of the partially-painted stuff that's been on my desk for the last couple months. I'm sort of back to a zero reset with just primed stuff.

These models weren't especially entertaining to paint. They have lots of little tiny bits of chitin all over them, and it was hard to use my normal washing techniques to speed the process. Instead I had to spend a fair amount of meticulous time painting the little details. And even then, I sort of feel like it wasn't a great paint job for the amount of time it took. However, they are done, and it lets me move on to the Ravagores next.